How to Register iMyMac PowerMyMac
1.
Firstly, you need to download PowerMyMac from here:
https://www.imymac.com/download/imymac-powermymac.pkg
2.
Then, show in Finder, double click PowerMyMac, drop it to Application icon and it will begin to install.
3.
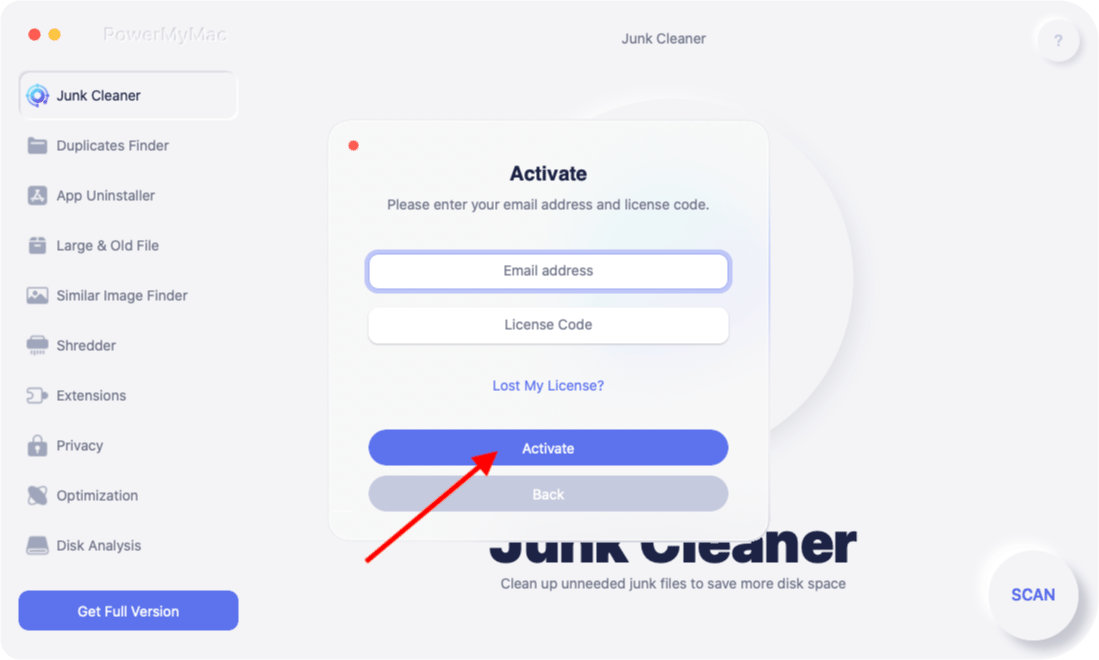
After finishing, launch PowerMyMac, click the 'Get Full Version' button locates on the left side and a new window will appear. Click "Activate" to start the activation process.
4.
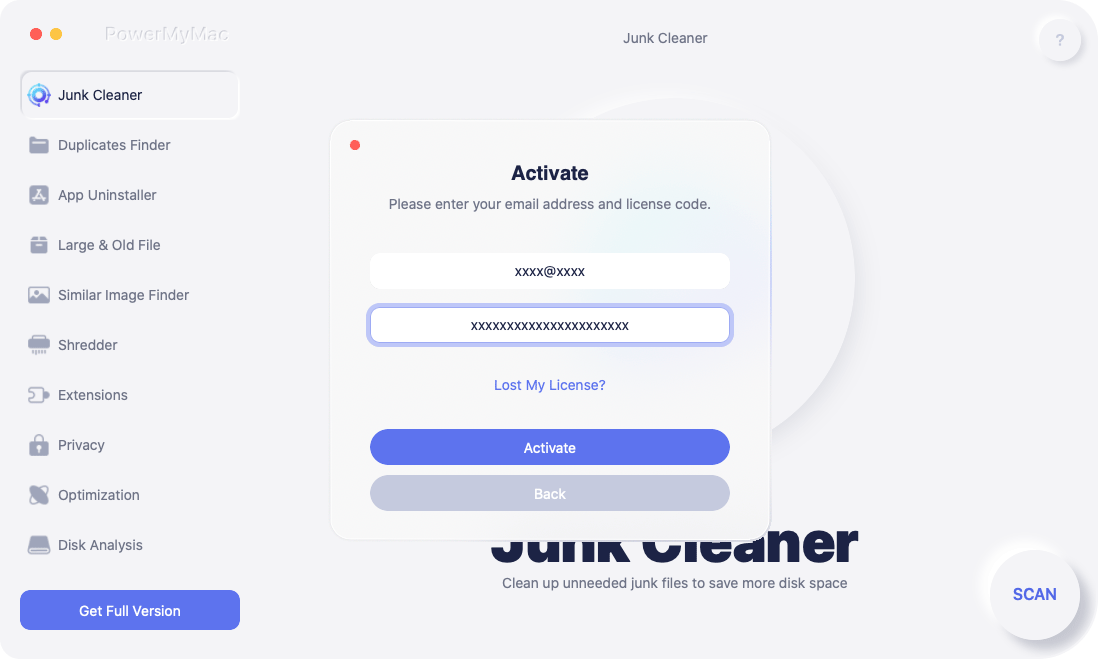
Fill in your Email address (used to purchase the license) and License Code.
5.
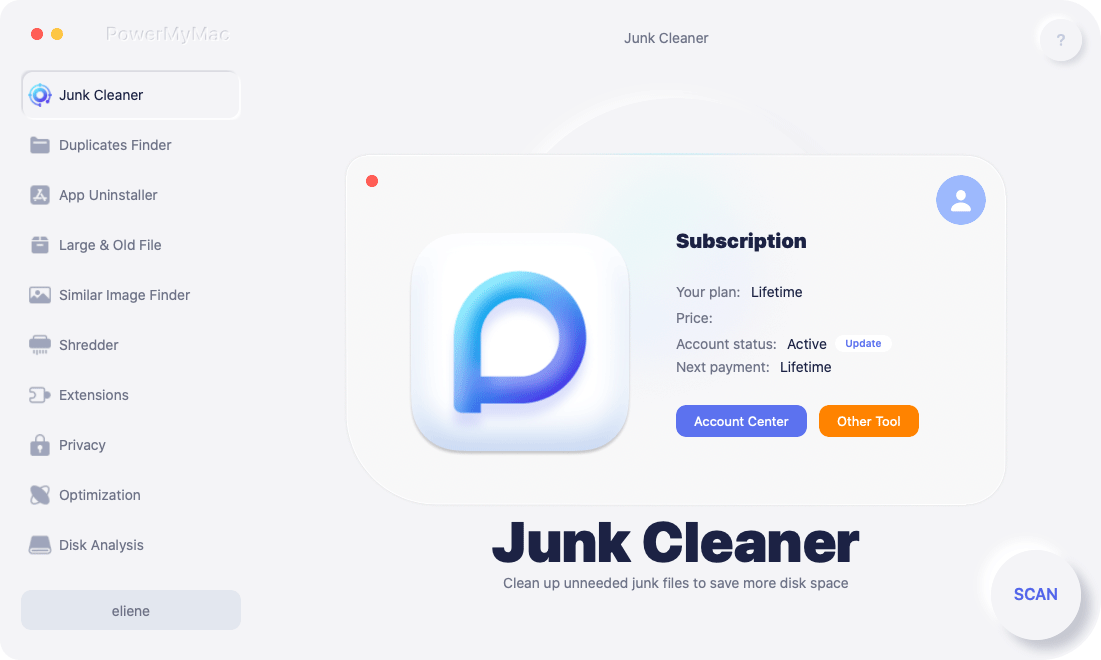
Click Activate then you will see your Subscription information like the plan, price, account status, and next payment day. You can also click the Account Center to check more personal details and manage your subscription.
How to Trust PowerMyMac on Your Mac
Step 1. Open System Preferences
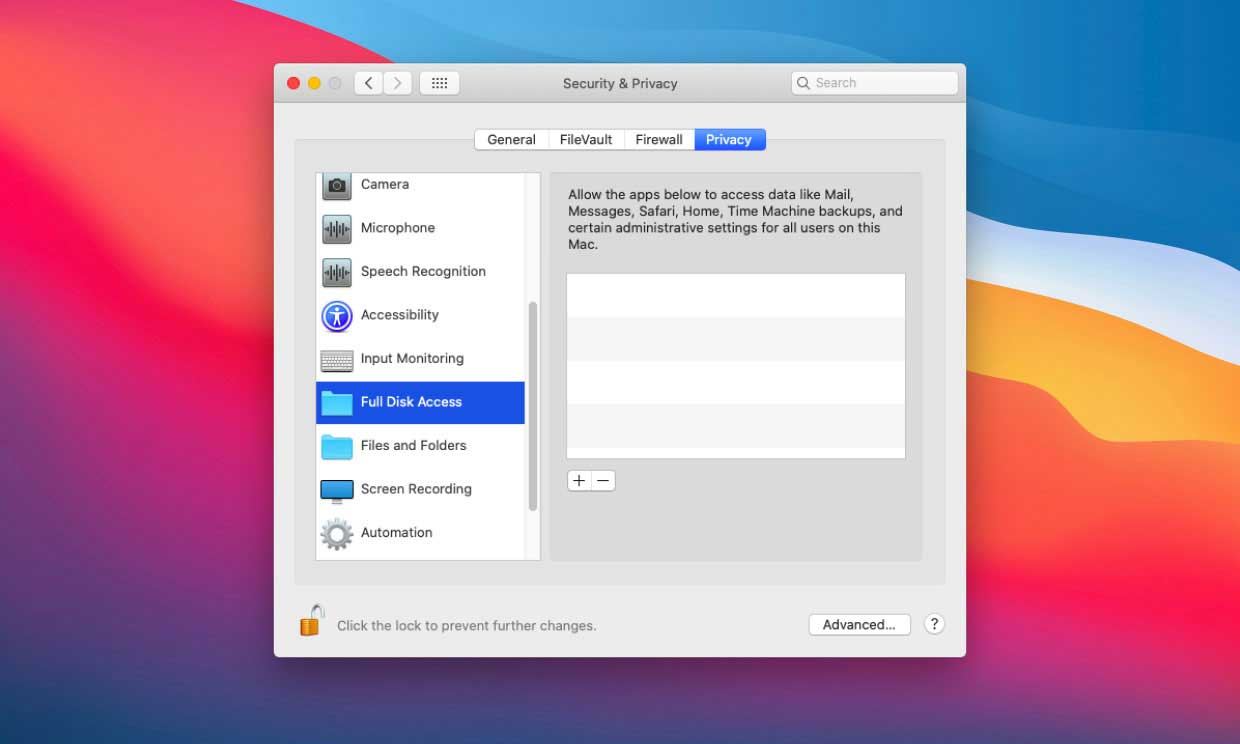
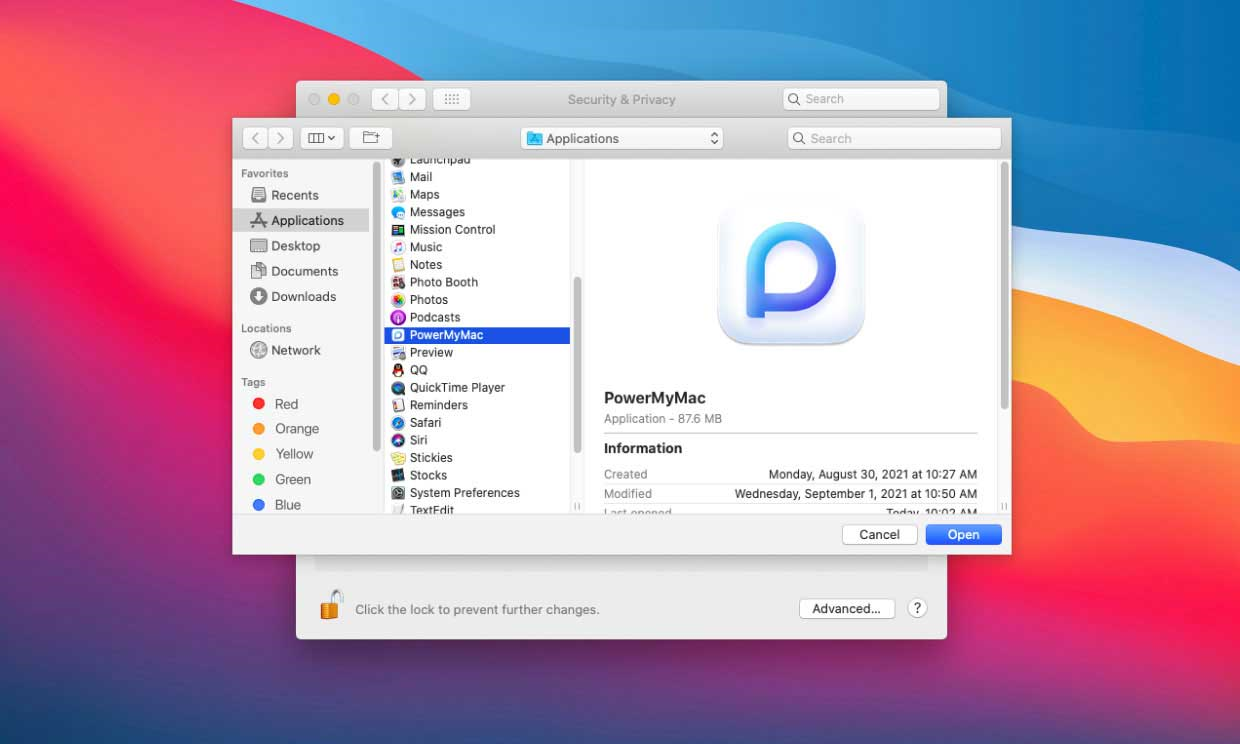
After launching PowerMyMac, just click the SCAN button then a new window will pop up. Click the Open System Preferences and you will go to the Full Disk Access window directly, then click the lock icon underneath to prevent further changes. To do this, you should enter your password to allow System Preferences to unlock Security & Privacy preferences. After that, click on the '+' button.
Step 2. Find PowerMyMac to Open
Click Applications to find PowerMyMac on your Mac, then press Open.
Step 3. Quit PowerMyMac
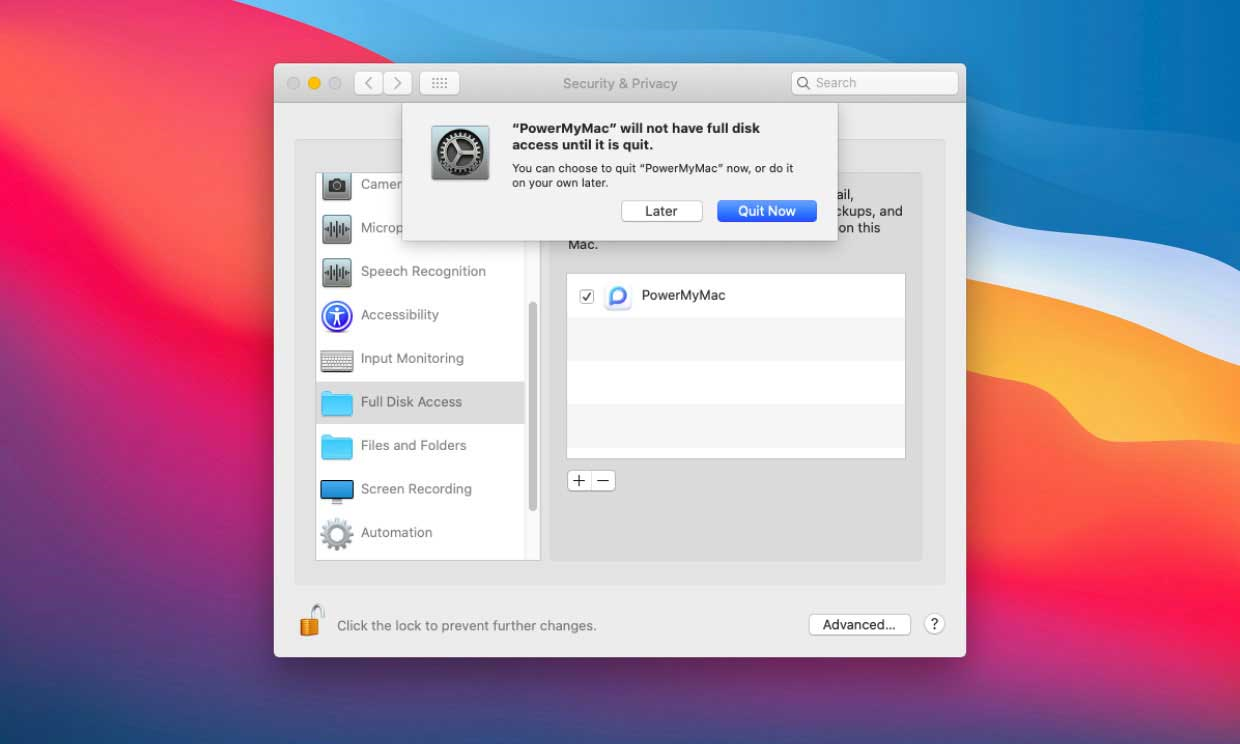
When a window pop up with "'PowerMyMac' will not have full disk access until it is quit", choose Quit Now.
Now, PowerMyMac has Full Disk Access to scan all areas of your Mac and protect your Mac from virus threats.
How to Use PowerMyMac
PowerMyMac is an all-in-one tool that can be utilized to clean and optimize your Mac. In just simple clicks, it can free up our Mac storage space, protect privacy, and speed up its performance. It has the ability to automatically identify and then selectively delete all the files that you do not need on your Mac computer which can easily free up gigabytes on your hard disk space.
Release Space with One Click
After launching PowerMyMac, you will see the PowerMyMac icon in the menu bar at the top-right corner of the screen, including CPU LOAD (Current CPU usage percentage), Network (Current network condition), Macintosh HD (total and currently available memory space), and RAM (total and currently used memory space). When you click the delete icon within Macintosh HD, PowerMyMac will auto-launch the Junk Cleaner for you to choose and clean junk files that you don't need. You can also click the icon in the RAM to free up RAM space with one click.
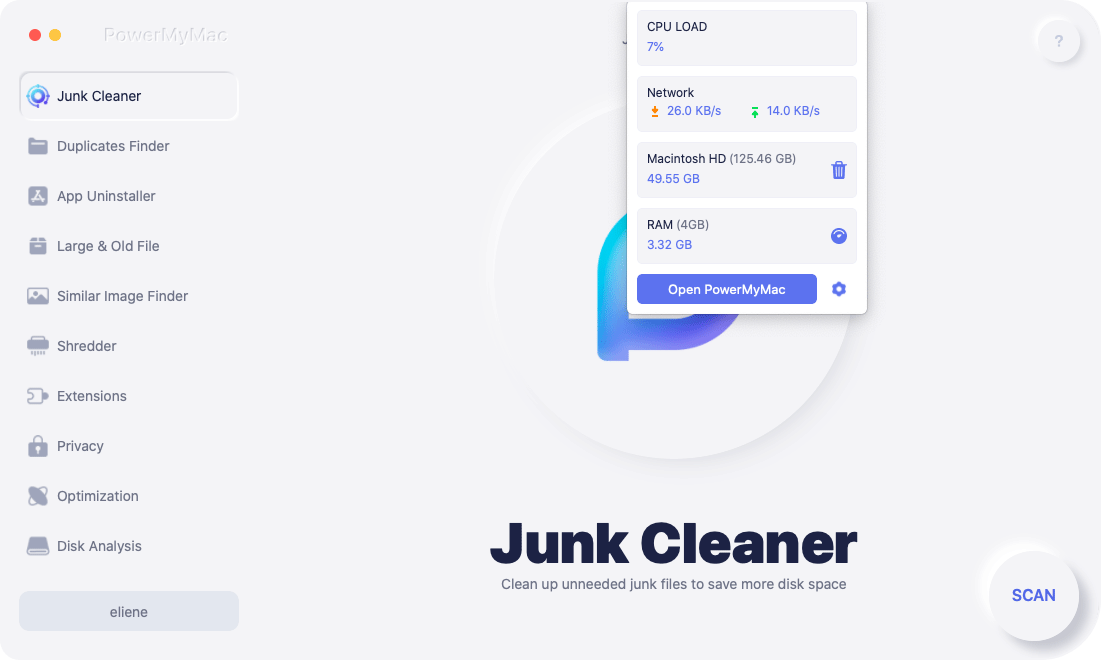
PowerMyMac has 10 main modules that can help you to clean up your Mac deeply with all kinds of junk files and unneeded apps. They are Junk Cleaner, Duplicates Finder, App Uninstaller, Large & Old Files, Similar Image Finder, Shredder, Extensions, Privacy, Optimization, and Disk Analysis.
Junk Cleaner - Scan and Clean up All Kinds of Junk on Mac
Junk Cleaner is designed to clear all kinds of system junk like System Logs, System Cache, User Logs, Application Cache, Photo Cache, Email Cache, Email Attachments, iTunes Backups, iTunes Downloads, iTunes Cache, Software Updates, and System Trash. You can use it to do a deep scan and cleanup of your junk files so as to free up tons of storage space on Mac. Here's how to use Junk Cleaner:
1.
Click on Junk Cleaner then press the SCAN button, PowerMyMac will begin to scan all the junk files on your Mac.

2.
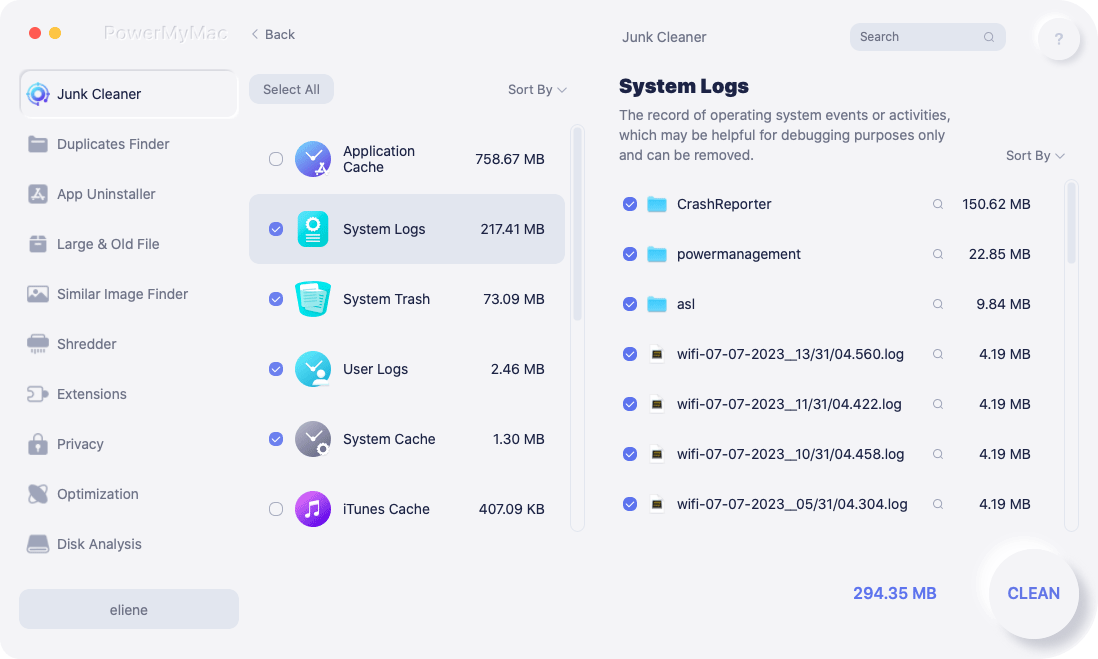
After the scanning, you can review all the junk files on your Mac by categories such as: Application Cache, Photo Cache, Email Cache, Email Attachments, System Cache, System Logs, User Logs, iTunes Cache, iTunes Backups, iTunes Downloads...
3.
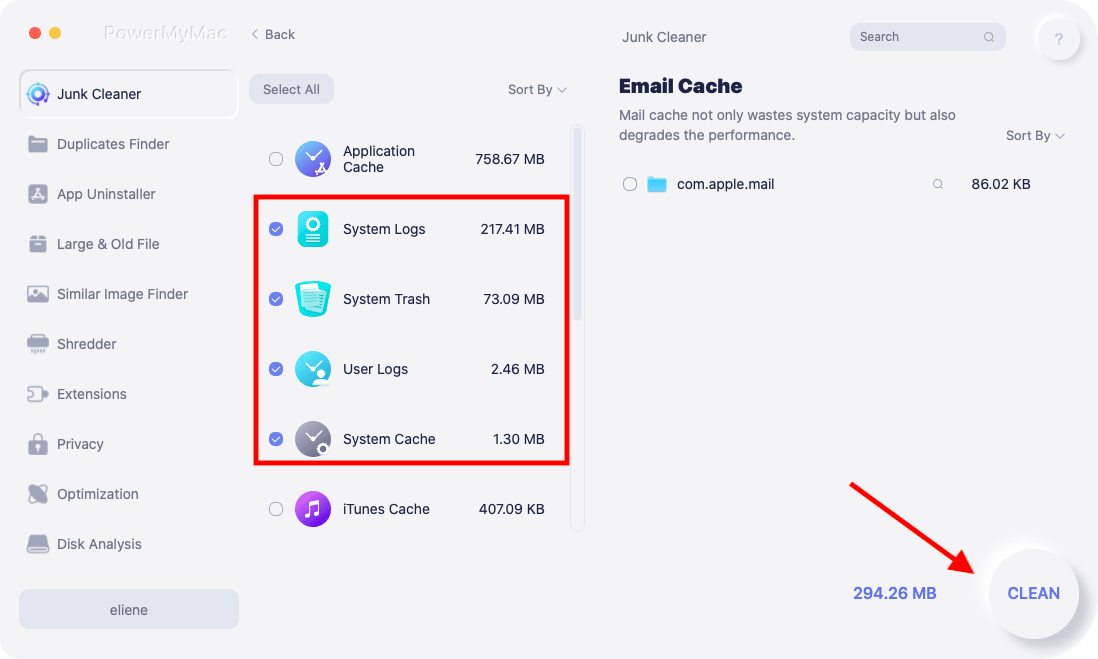
Select which file you'd like to clear out, or you just can tick the 'Select All' to clean up all junk files.
4.
Click on the CLEAN button then PowerMyMac will remove your selected files in just a few seconds.
5.
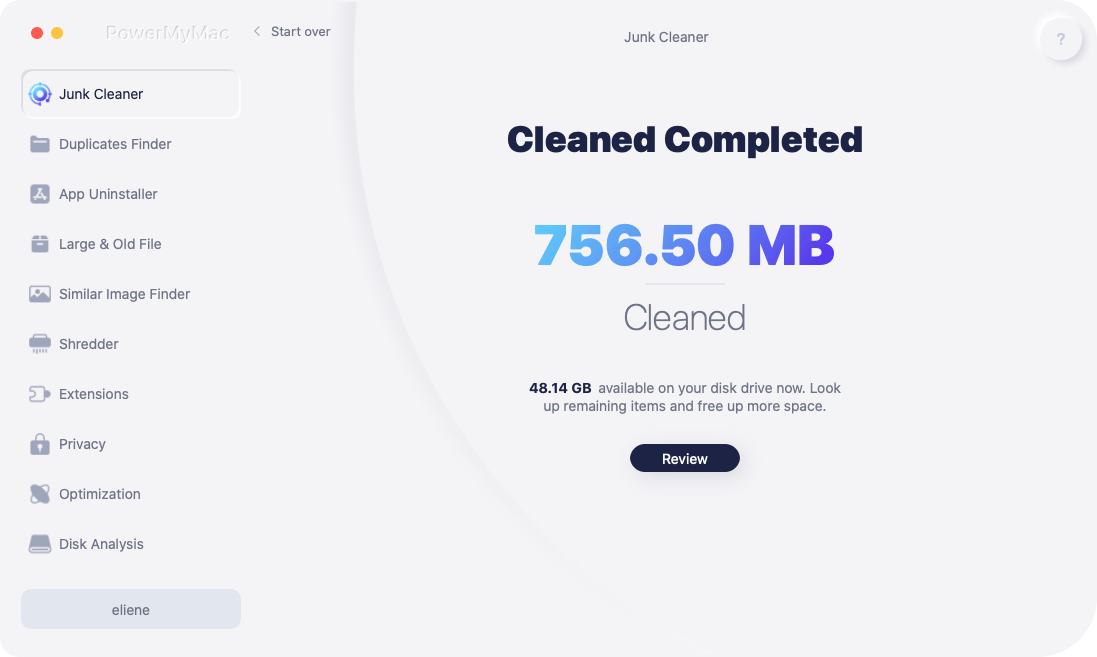
A new pop-up window will indicate "Cleaned Completed" after the cleaning process, and you can see how much space you cleaned just now as well as how much space is available on your disk drive now. If you want to remove more files, just click the Review button to go back to the scanning result page.
Duplicates Finder - Locate and Remove Duplicate Photos, Documents, Videos
Duplicates Finder is set to search for all duplicates on Mac including images, documents, videos, music, and other files or folders, then you can delete the copies to free up space. Check how to find and delete duplicates here:
1.
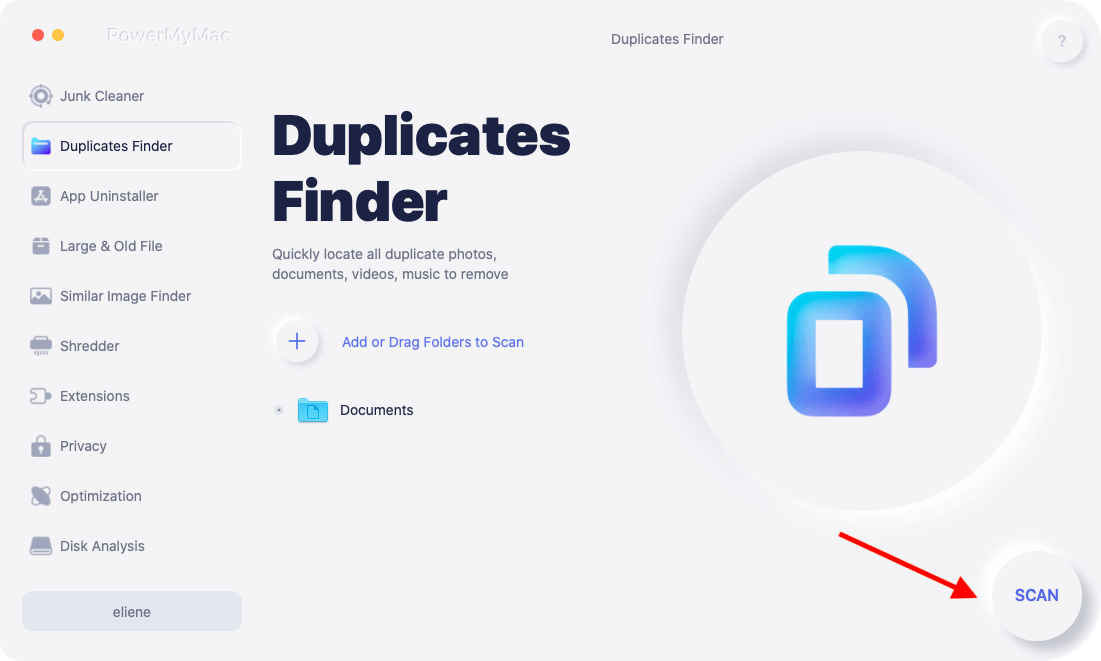
Select Duplicates Finder then click the "+" button to choose a folder to scan. Let PowerMyMac search for all duplicate files on Mac by pressing the SCAN button. You can change the path to scan more duplicates.
2.
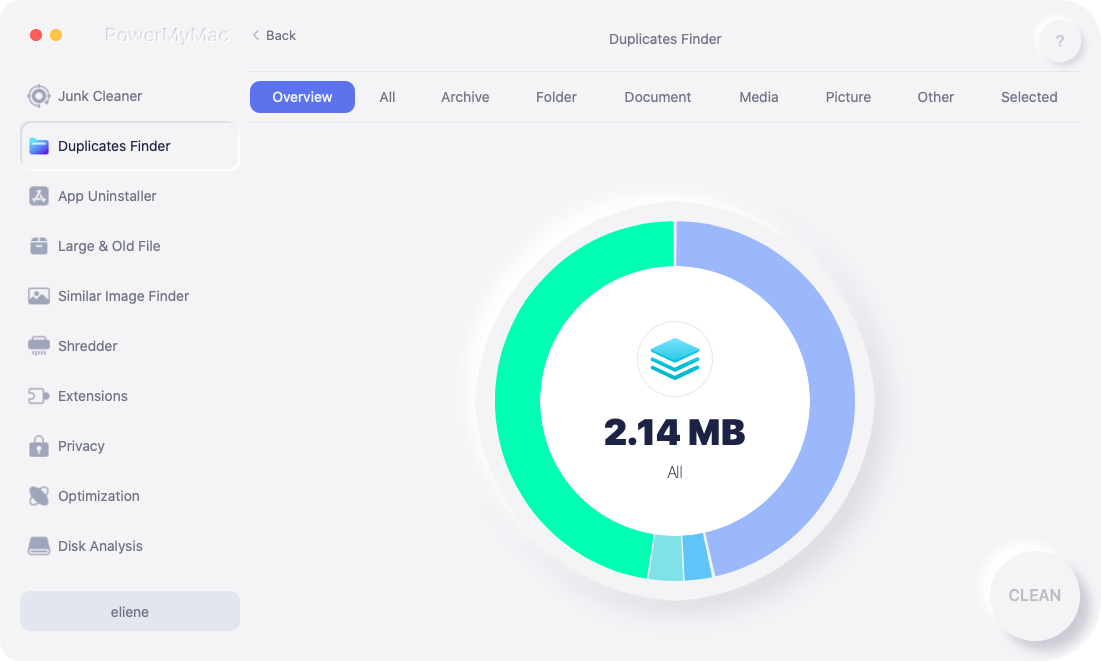
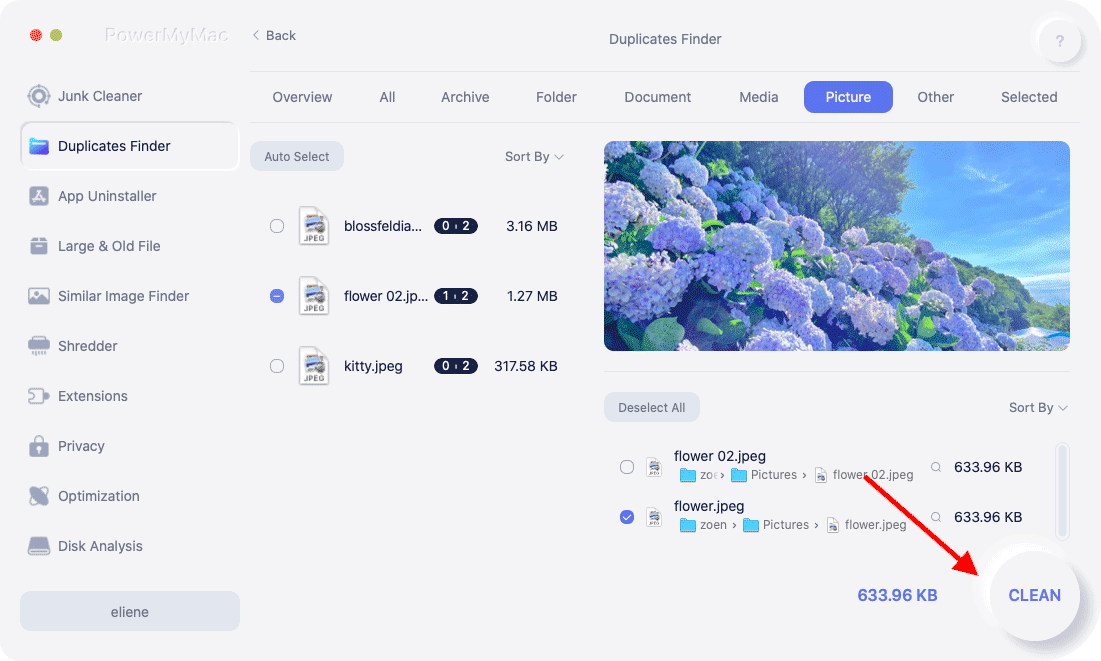
Once done the scanning, you can see all duplicate files are classified into All, Archive, Document, Folder, Media, Picture, and Other. Choose one category then click auto select, PowerMyMac will auto check all duplicates and leave the original one. You can also review each file by clicking the search icon behind each duplicate file name.
3.
Click the CLEAN button to remove the selected duplicates.
4.
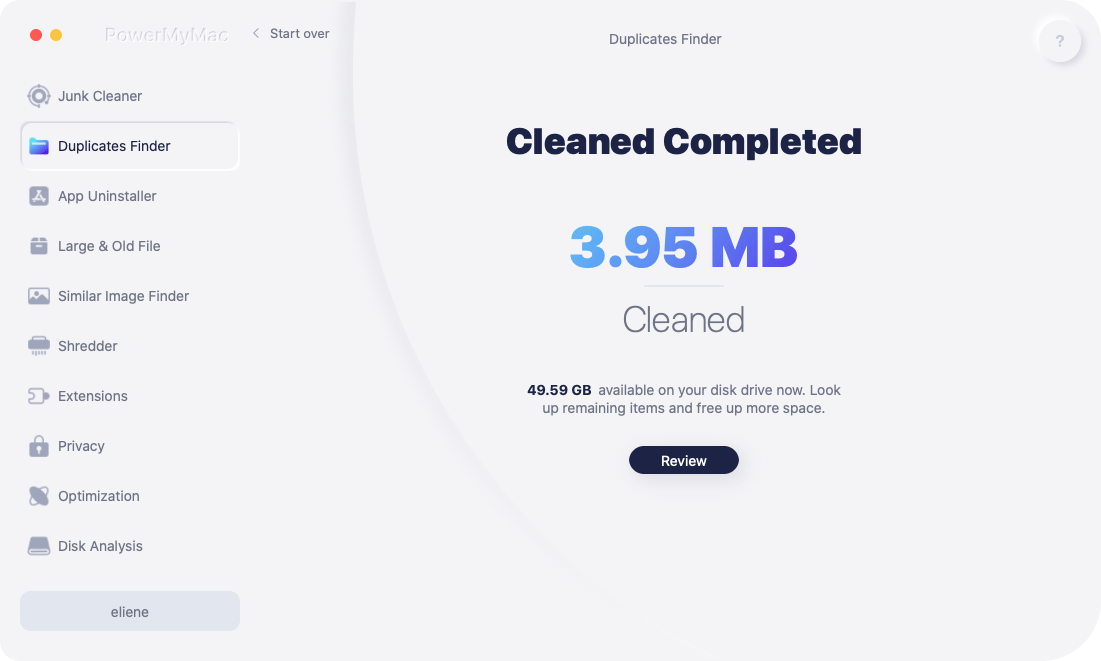
A "Cleaned Completed" pop-up window will indicate how many files are cleaned and how much space available on your disk drive now. If you want to remove more files, just click the Review button to go back to the scanning result page.
App Uninstaller - Uninstall Apps on Mac Fully with Related Files
App Uninstaller is an effective tool you can use to completely delete an app as well as its related files in just a few clicks. You can save time finding app's related files one by one. See how effective it is to use this tool to uninstall unwanted or useless apps:
1.
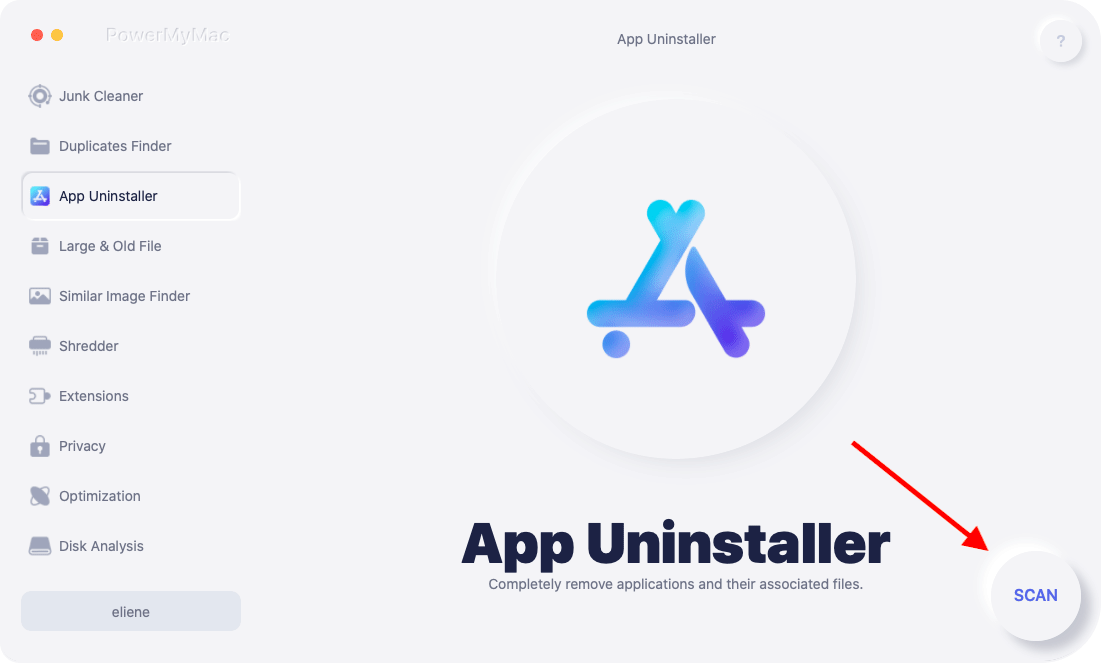
Click App Uninstaller and press SCAN to let PowerMyMac start scanning all the apps that are already installed on your Mac.
2.
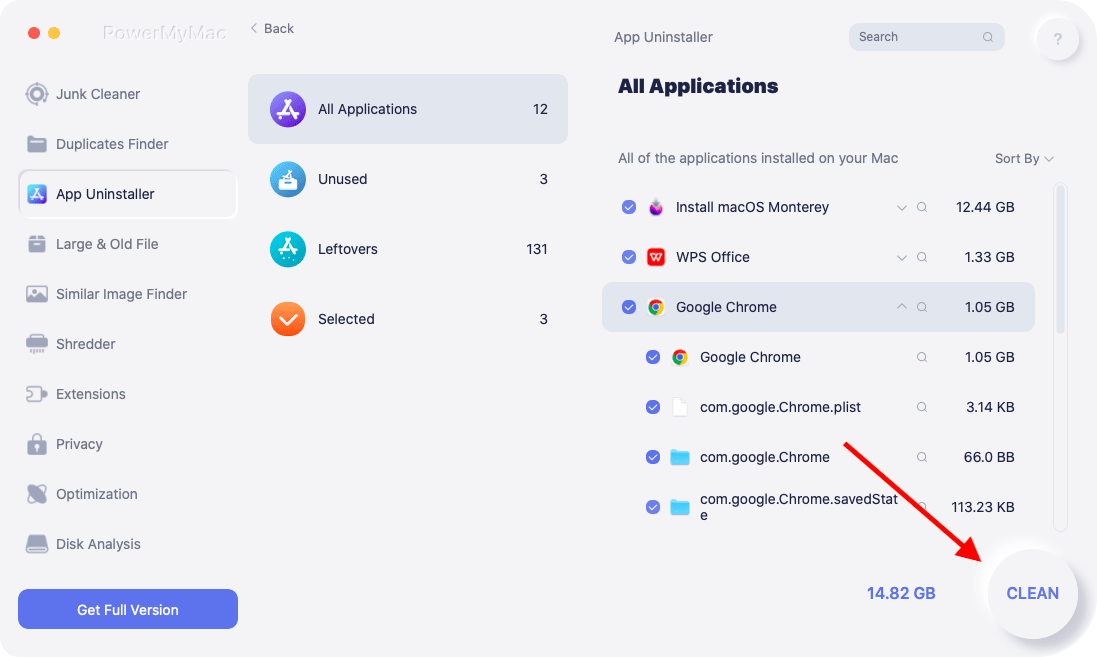
After the scanning process is done, you will see these categories on the left side: All Applications, Unused, Leftovers and Selected. The list of all apps will appear on the right side of the All Applications page. Locate your unwanted app from that list or just simply type its name on the Search box in the upper right corner to quickly locate it.

3.
Tick the app you want to uninstall, you can see its related files by clicking the Unfold symbol and check more details by clicking the search icon. Simply press the CLEAN button, the apps will be removed as well as their related files.
4.
A "Cleaned Completed" pop-up window will indicate how many files are cleaned and how much space available on your disk drive now. If you want to remove more apps, just click the Review button to go back to the scanning result page.

Large & Old File - Find Big and Out-of-date Files by Size and Time to Remove
Large & Old Files can help you locate those outdated files but take up a lot of space on Mac to delete, which can save you more room for other files. Following simple steps to use this feature:
1.
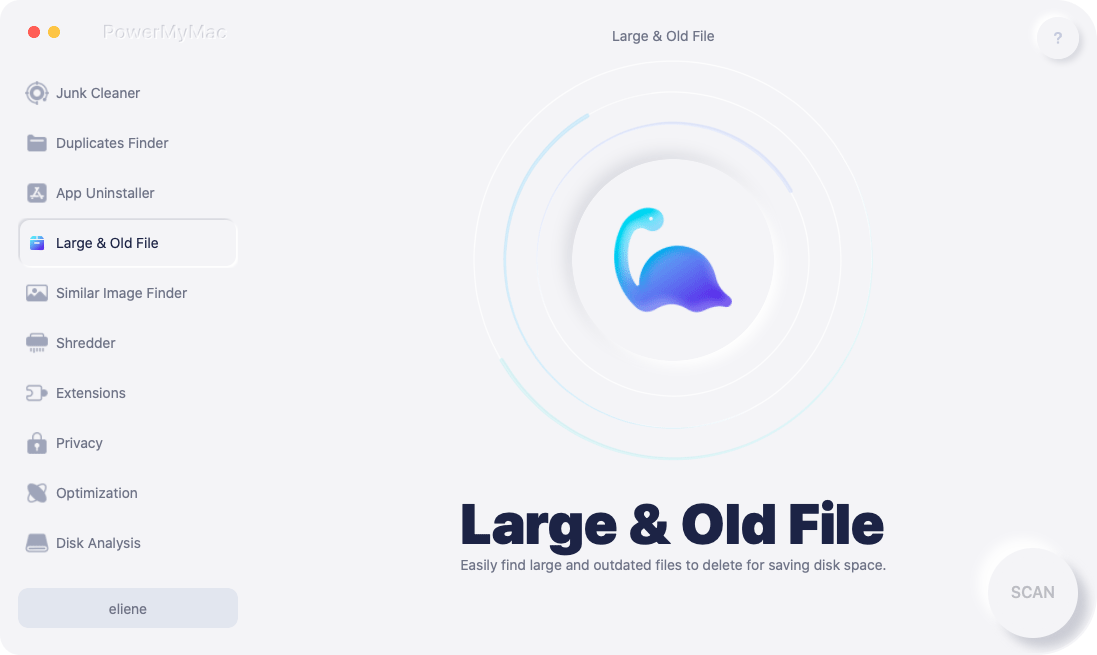
Choose the Large & Old File module and click SCAN to start the scanning process.
2.
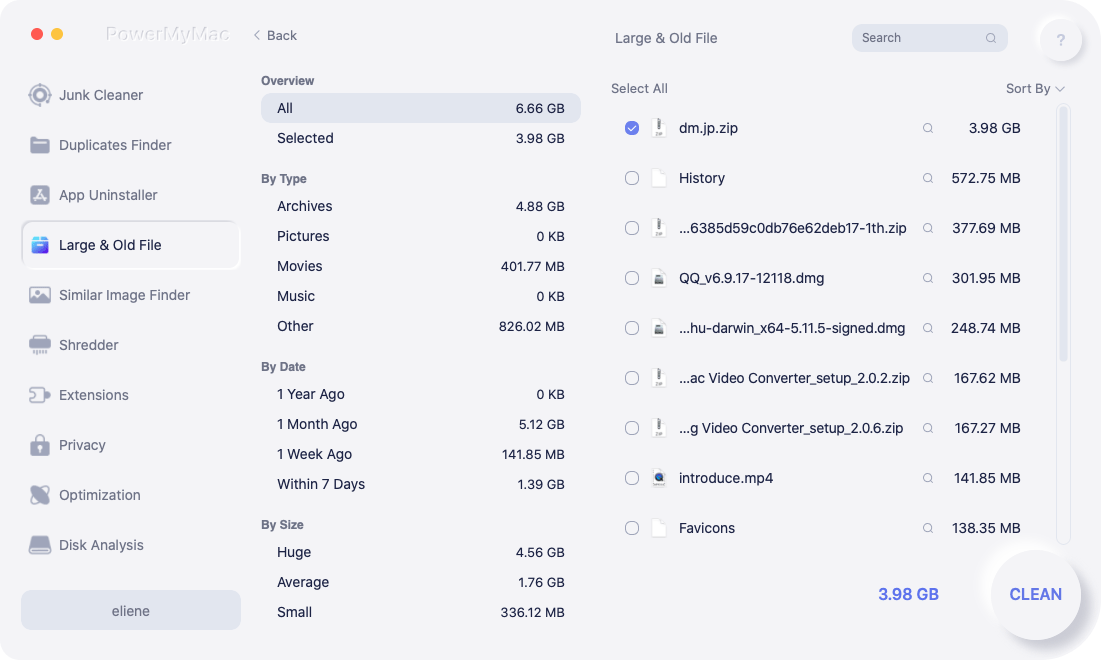
Have a look at the scanning result, these files will be sorted by Type, Date, and Size. By type, you can choose from archives, pictures, movies, music, and other; By date, you can see files downloaded 1 year ago, 1 month ago, 1 week ago, and within 7 days; By size, there are files belong to huge, average, and small.
3.
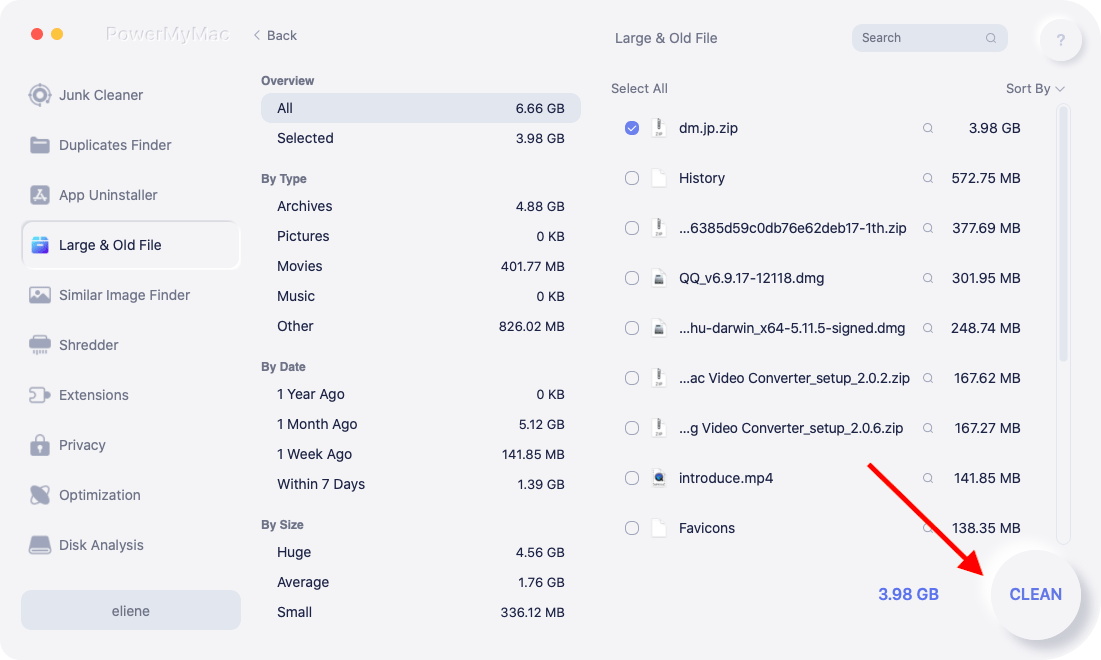
You can also see all the file in Overview and select files that you want to remove then press CLEAN. This time, you have deleted your unwanted large and old files.
4.
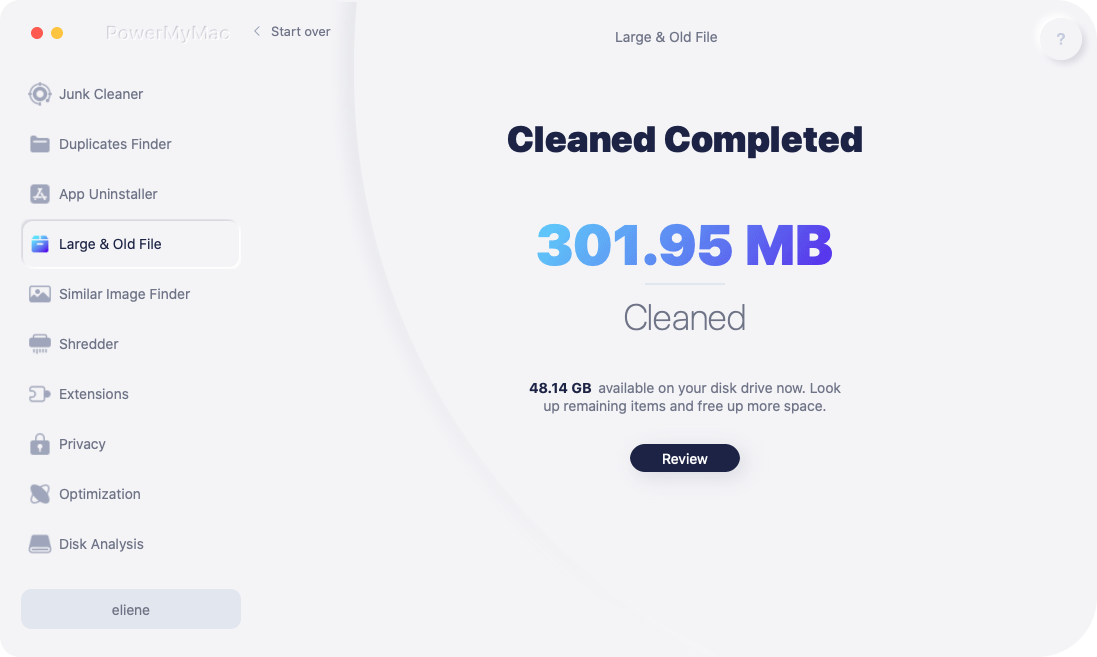
A "Cleaned Completed" pop-up window will indicate how many files are cleaned and how much space available on your disk drive now. If you want to save more space, you can also clear out the remaining items by clicking the "Review" button.
Similar Image Finder - Quickly Locate and Remove Similar Images to Free up Space
Similar Image Finder is a smart photo manager which can locate all the similar images on your Mac for you to delete and release tons of space since images all have a large file size. Here are the steps to use this photo manager:
1.
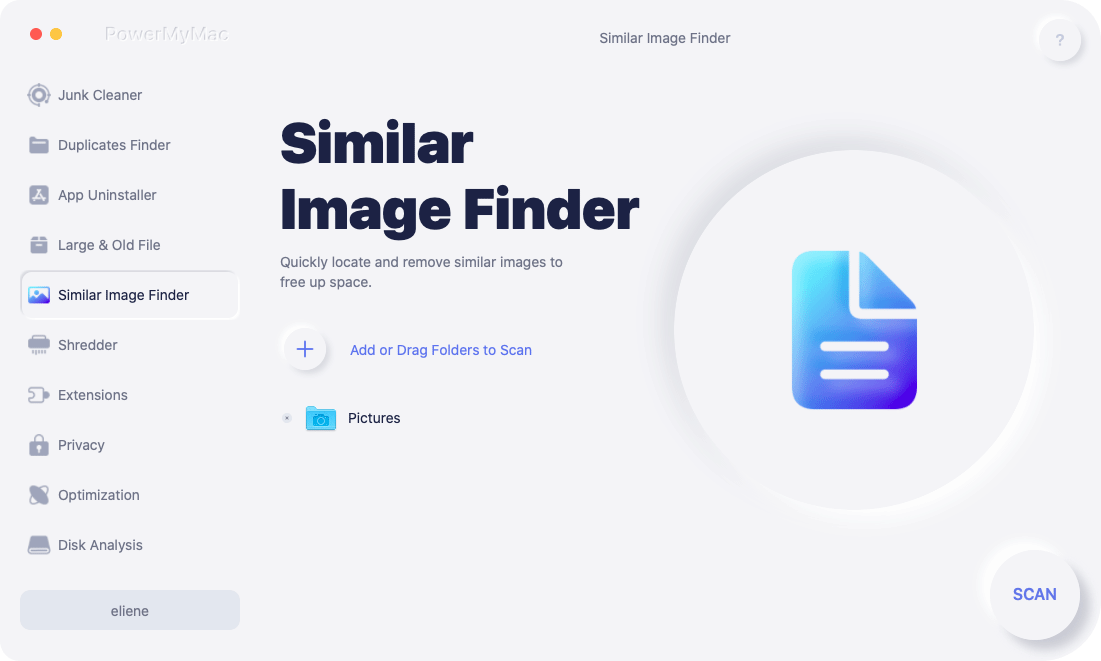
Click Similar Image Finder. Click the "+" button to choose a folder to scan all similar images.
2.
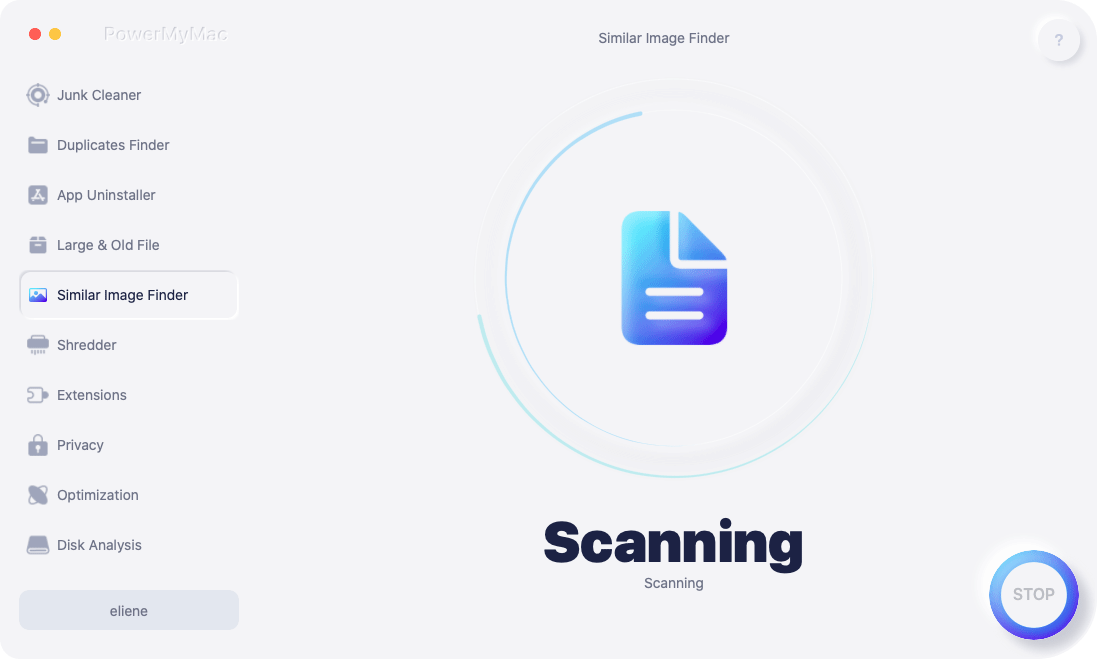
Start locating all the similar images by pressing the SCAN button, you can change the path to scan more similar photos.
3.
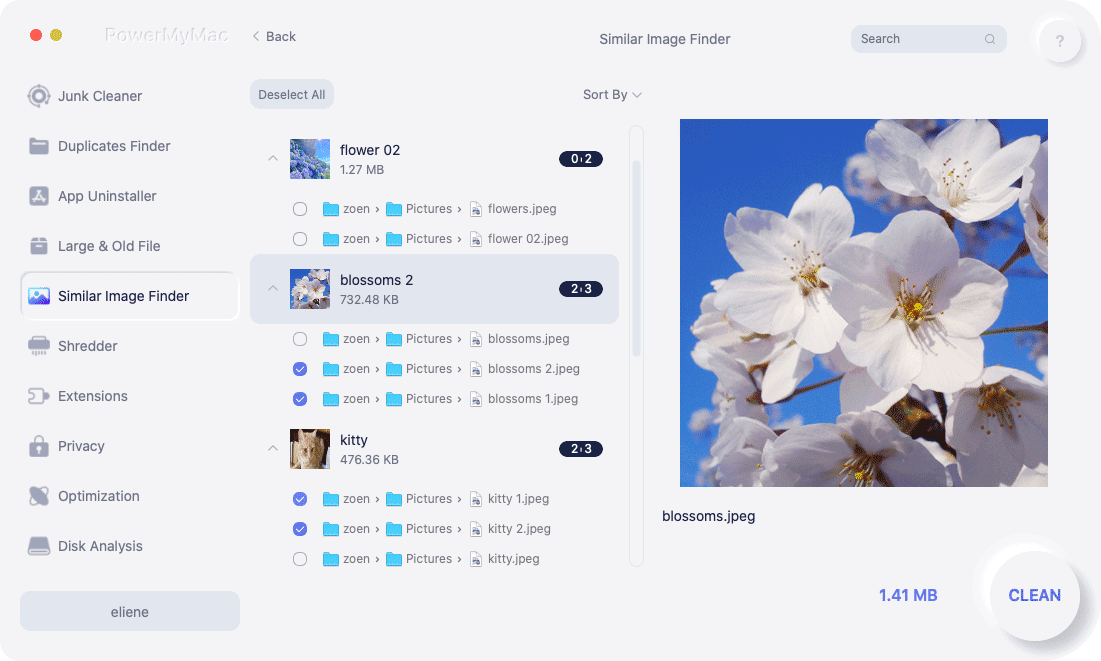
After scanning, PowerMyMac will show you all the similar images and auto select the similar ones for you to delete. You can also click the file name to review and select which one to remove by yourself.
4.
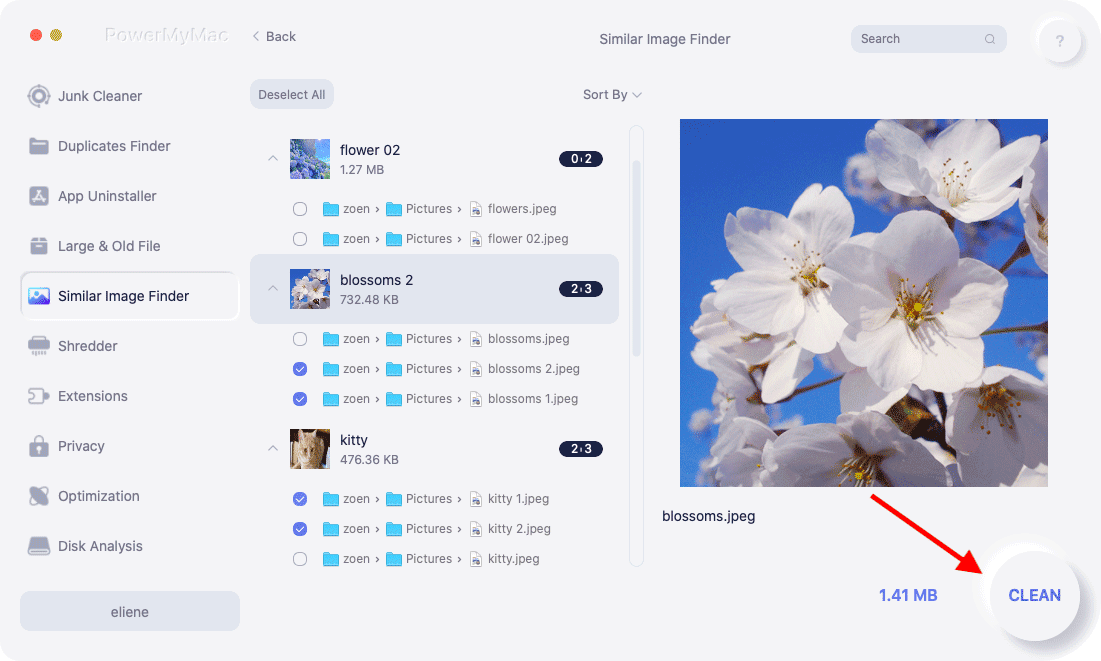
Simply click the CLEAN button to delete those similar photos.
5.
A new pop-up window will indicate 'Cleaned Completed' after the cleaning process, and you can see how much space you cleaned just now as well as how much space is available on your disk drive now. If you want to remove more similar images, just click the Review button to go back to the scanning result page.
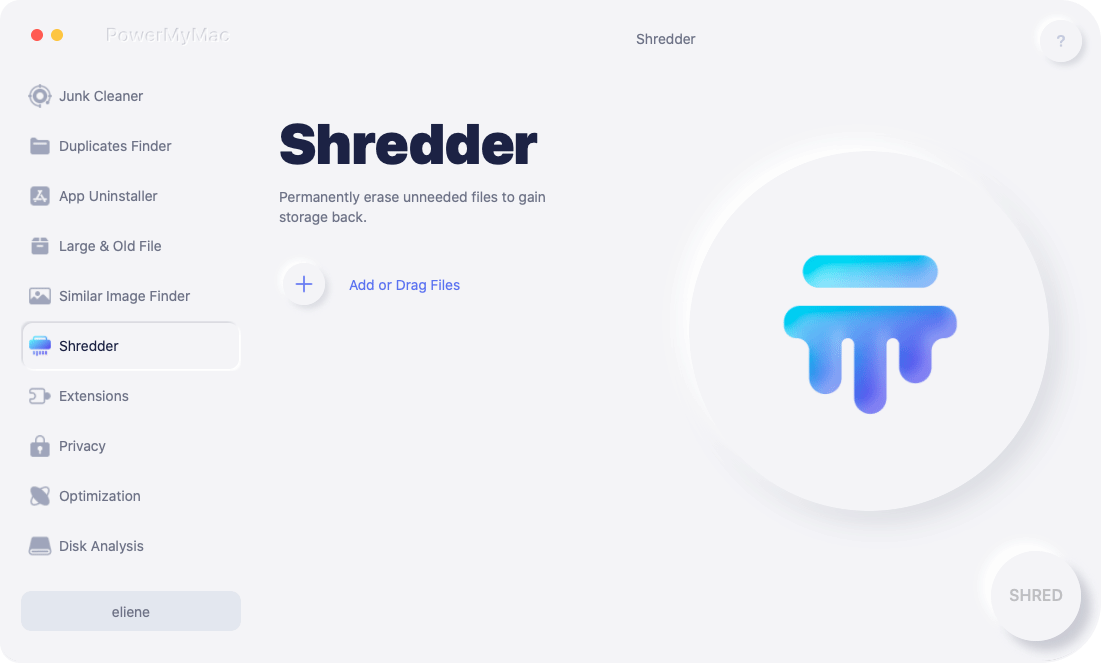
Shredder - Permanently Erase Unneeded Files to Gain Storage Back
Shredder helps you to secure delete unnecessary or no-longer-used files and folders forever:
1.
Click Shredder.
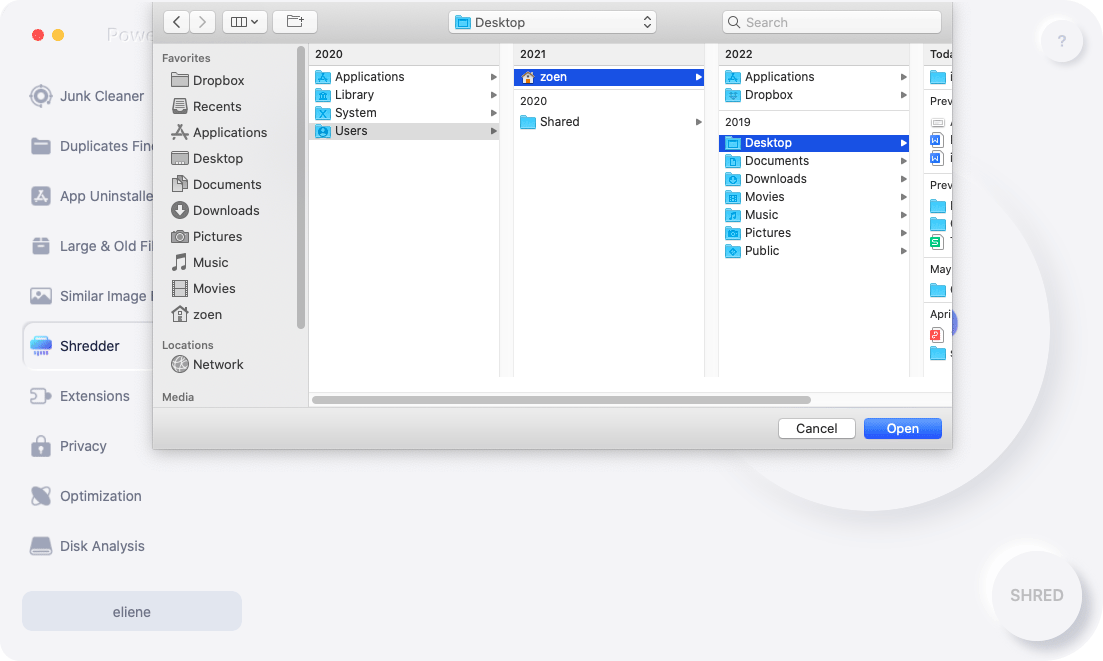
2.
Click the "+" button to choose the files you want to delete forever from your Mac. You can choose more other files to remove by pressing the Add button again.
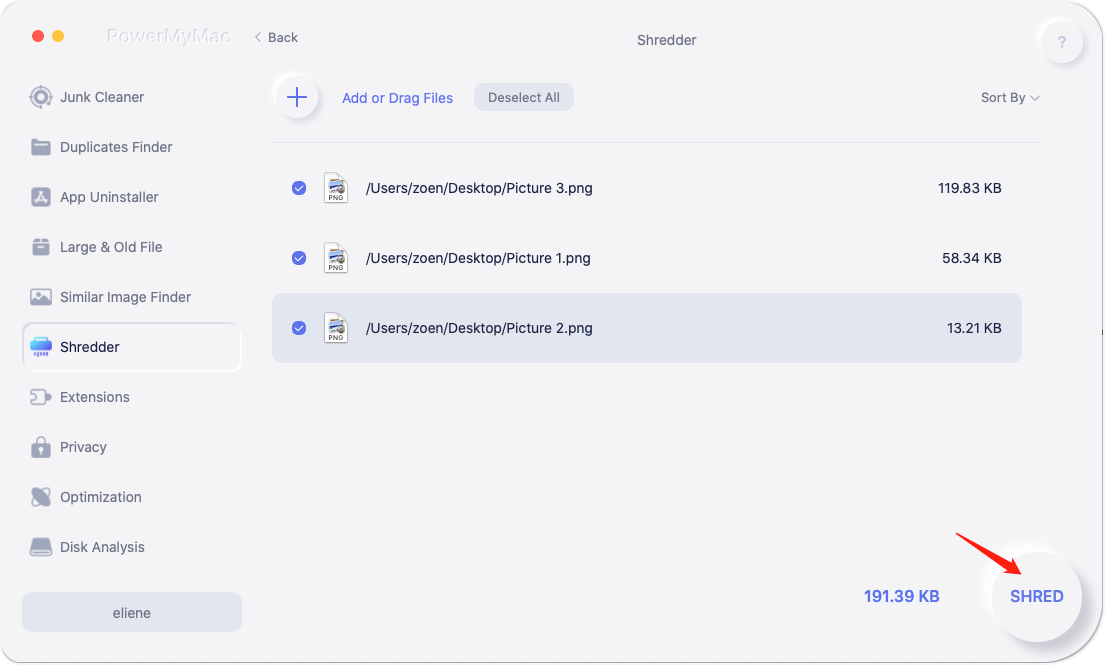
3.
Press SHRED and tick your selected files to start erasing. Then confirm to SHRED.
4.
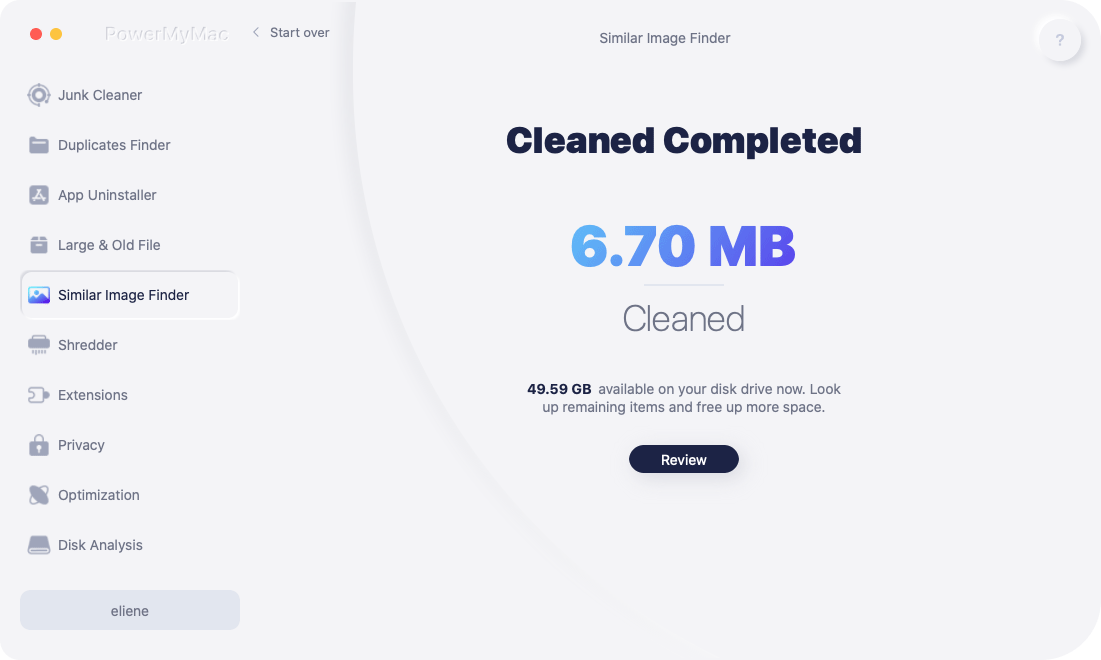
A "Cleaned Completed" pop-up window will indicate how many files are cleaned and how much space available on your disk drive now. If you want to erase more files to protect your privacy, you can also check out the remaining items by clicking the "Review" button.
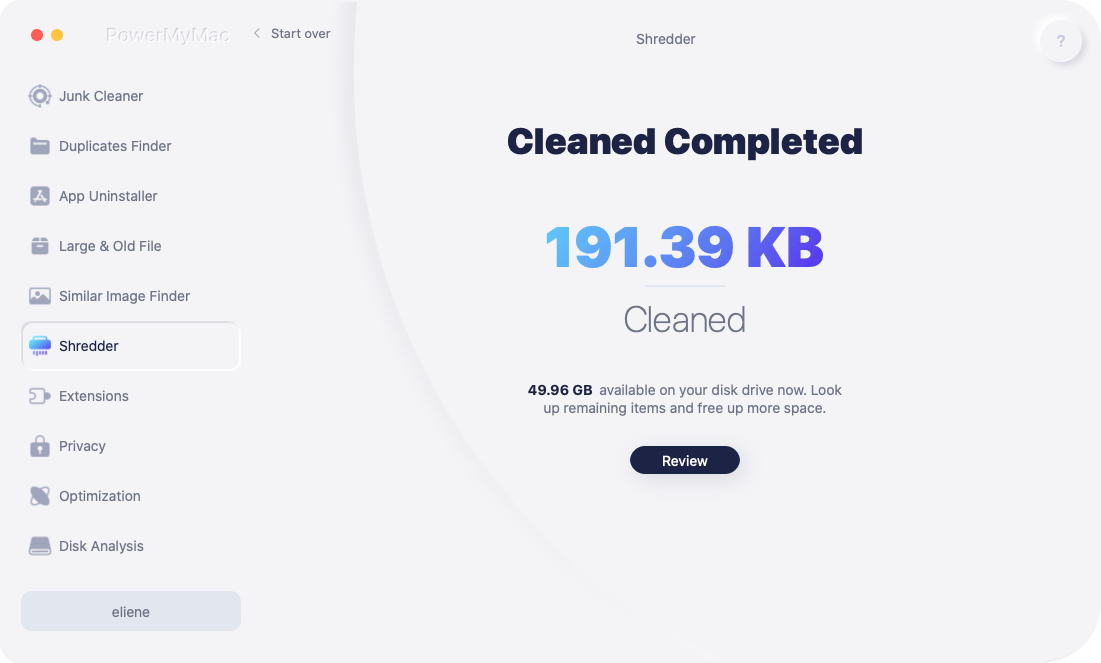
Extensions - Manage Built-in Plugins, Start-up Items, Proxy, and Services
Extensions tool is designed to optimize some rarely used settings on your Mac to help you speed up and improve the performance of your Mac. See how it works to easily manage built-in plugins, proxy, services, and startup items here:
1.
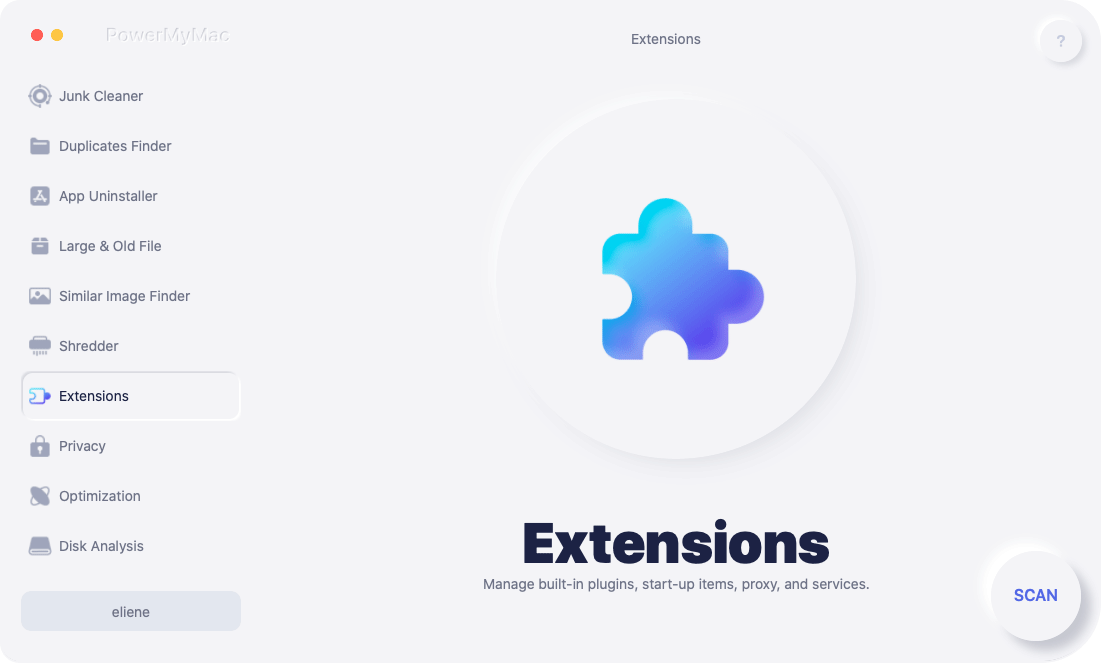
Click Extension.
2.
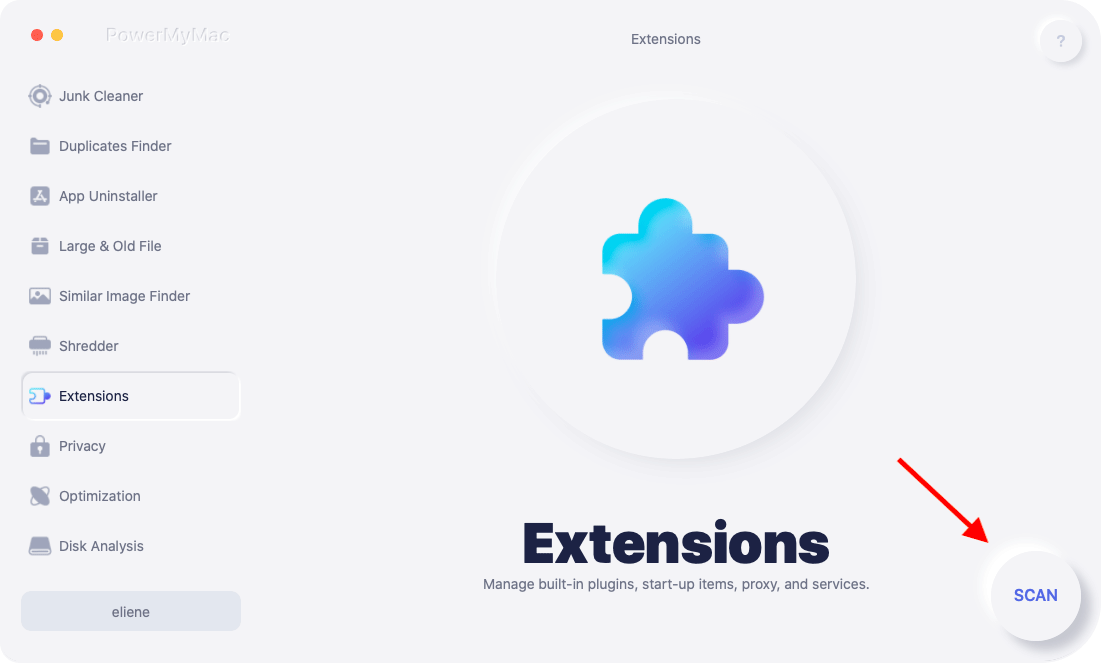
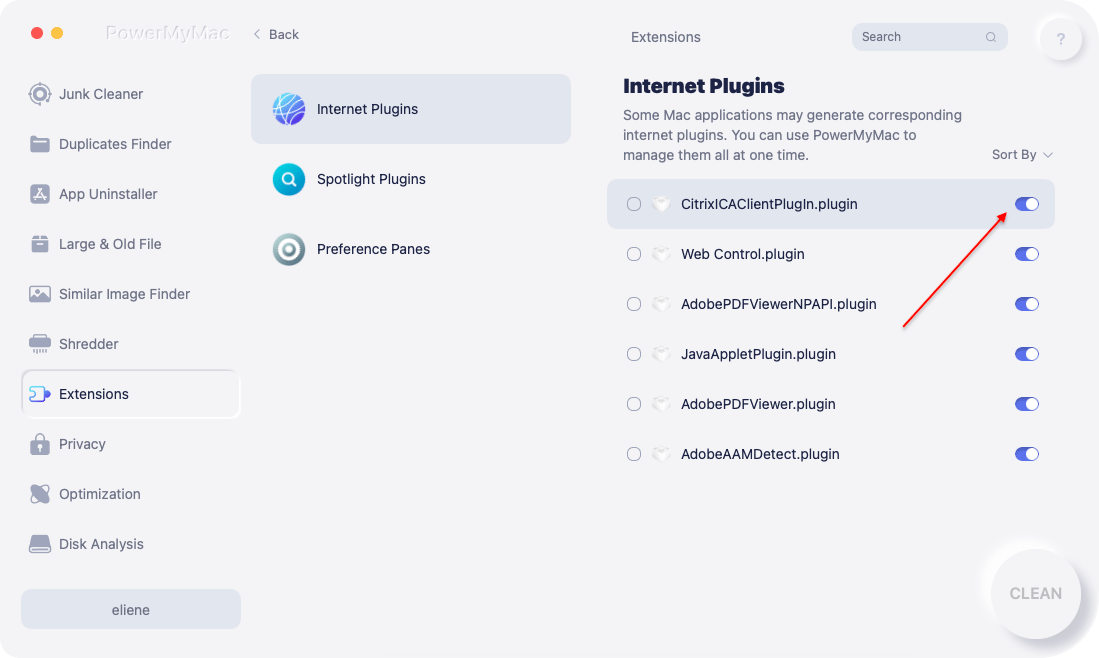
Press the SCAN button to find all the extensions on Mac and have a preview. You will see that all extensions are divided into these categories: Spotlight Plugins, Safari Extensions, Internet Plugins.
3.
Simply enable or disable these extensions by switching the button behind the extension from on to off.
Privacy - Clear All Browsing Data to Protect Your Privacy
Privacy allows you to clear all browsing histories, cookies, downloads, tabs, local storage files, or others from all browsers on Mac safely, thus you can avoid revealing your personal privacy. Check how it works here:
1.
Run Privacy then SCAN all the browsing data on your Mac. If you are running browsers this time then you need to close them first to clean more related data.

2.
After scanning, you will see all your browsers, recent item, application permissions are listed on the left side. You can check all browsing data like Auto Fills Value, Cookies, Downloaded File History, Download History, Login History, Search History, Visit History on Chrome, Safari, Firefox, or other browsers.
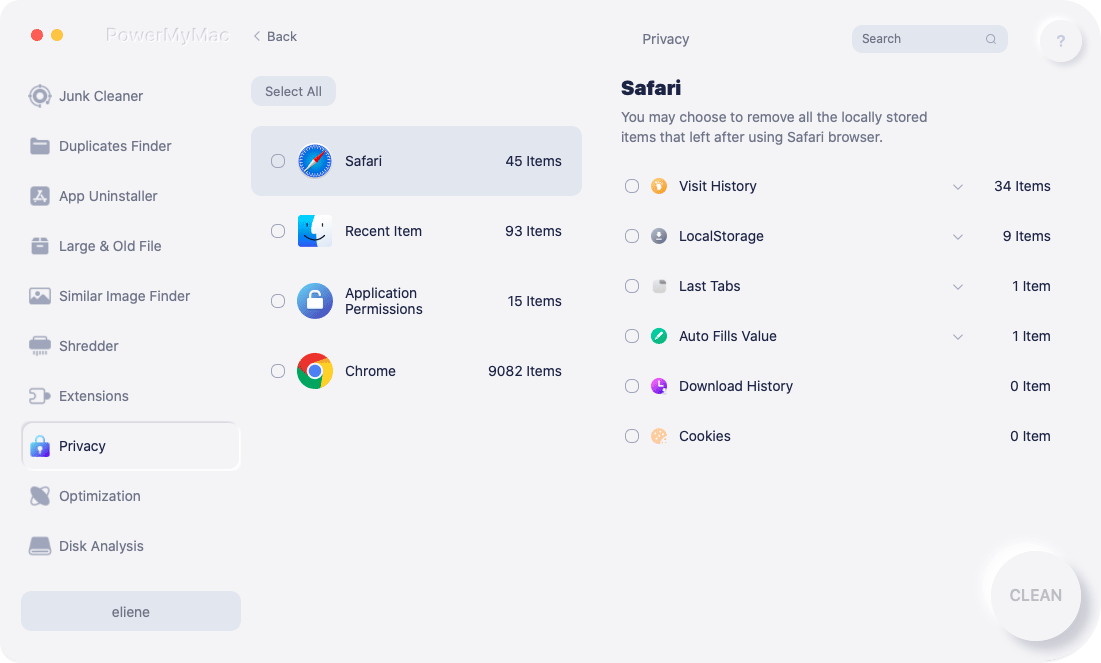
3.
Choose the data you'd like to clear out and click on the CLEAN button, the selected browsing data will be removed at once.
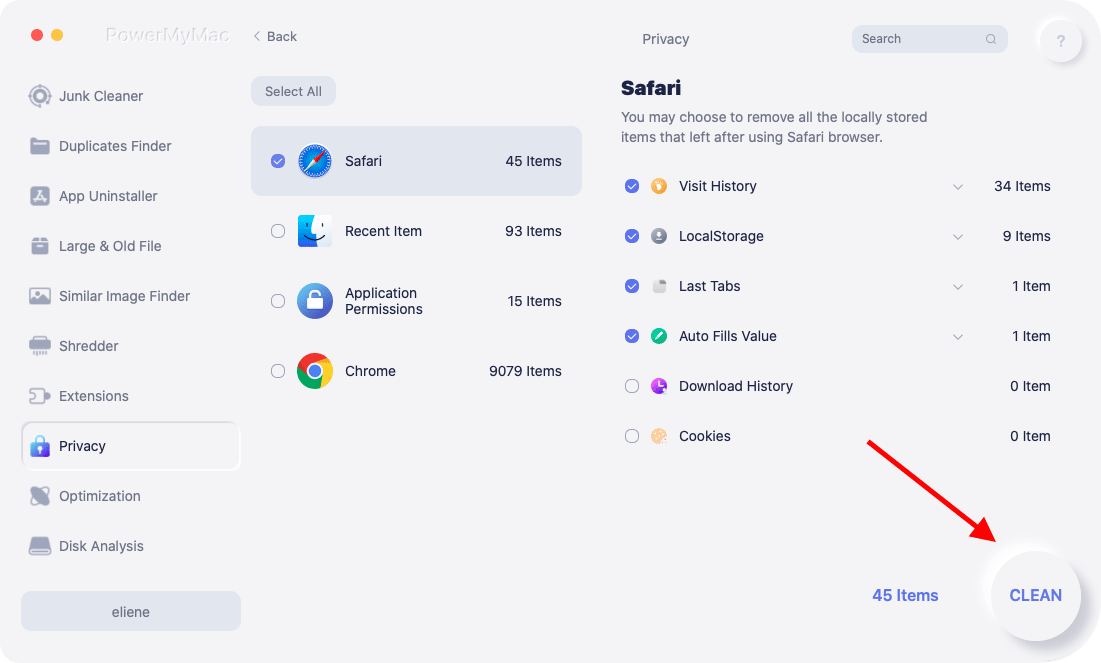
4.
A "Cleaned Completed" pop-up window will indicate how many files are cleaned and how much space available on your disk drive now.
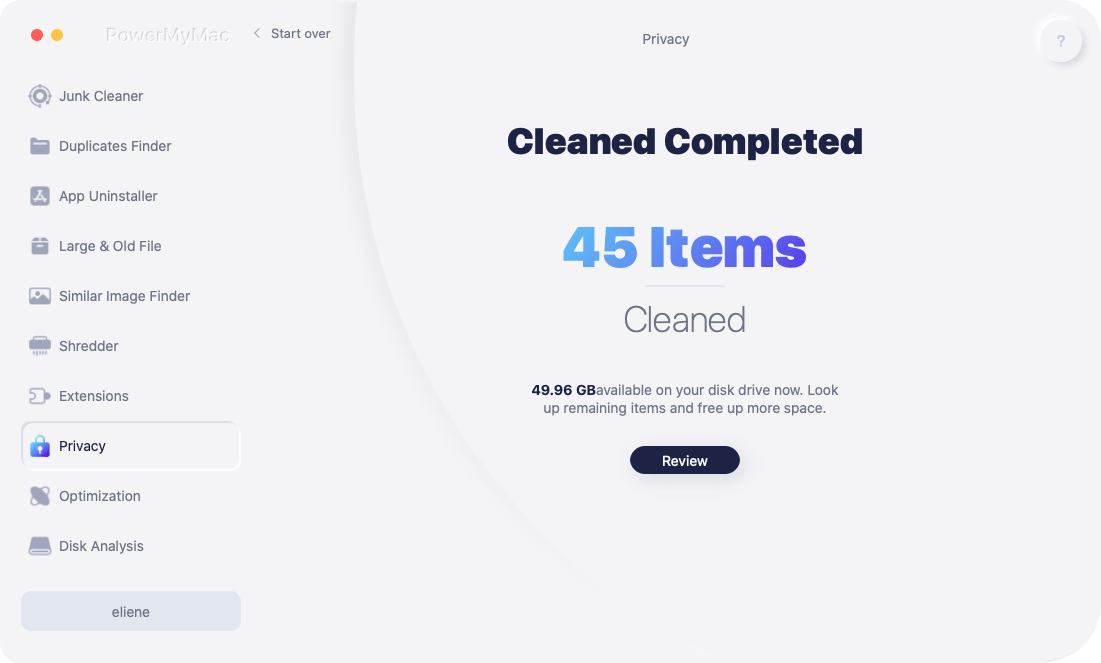
Optimization - Speed up Your Mac
Via Optimization, you can increase your Mac's output by staying in control of what's running on it. Within this tool, there are 4 features you can make use of to speed up Mac including Login Items, Speed Up Mail, Free up RAM, Clean DNS Cache. Check detailed expanation to each function:
- Login Items: Manage the list of applications that are automatically opened every time when you log in. You can simply enable or disable those apps that are unneeded or less used.
- Speed Up Mail:PowerMyMac re-indexes the Mail database to get improvement on inbox performance and search speed. And do not affect your email whenever you do this safe and practical process. We recommend you occasional use it when Mail application's search speed becomes slow.
- Free up RAM: Mac memory will be filled up frequently and start running slow. This function helps you to get rid of all the useless junk from the memory to speed up your Mac.
- Clean DNS Cache: A local cache of resolved DNS (Domain Name System) queries for the time defined by the DNS server will be kept by your Mac, but sometimes the cache may need to be reset immediately. You can use it when fail to connect to some websites or when the network slows down from time to time.
Disk Analysis - Analyze Disk Memory for A Quick View
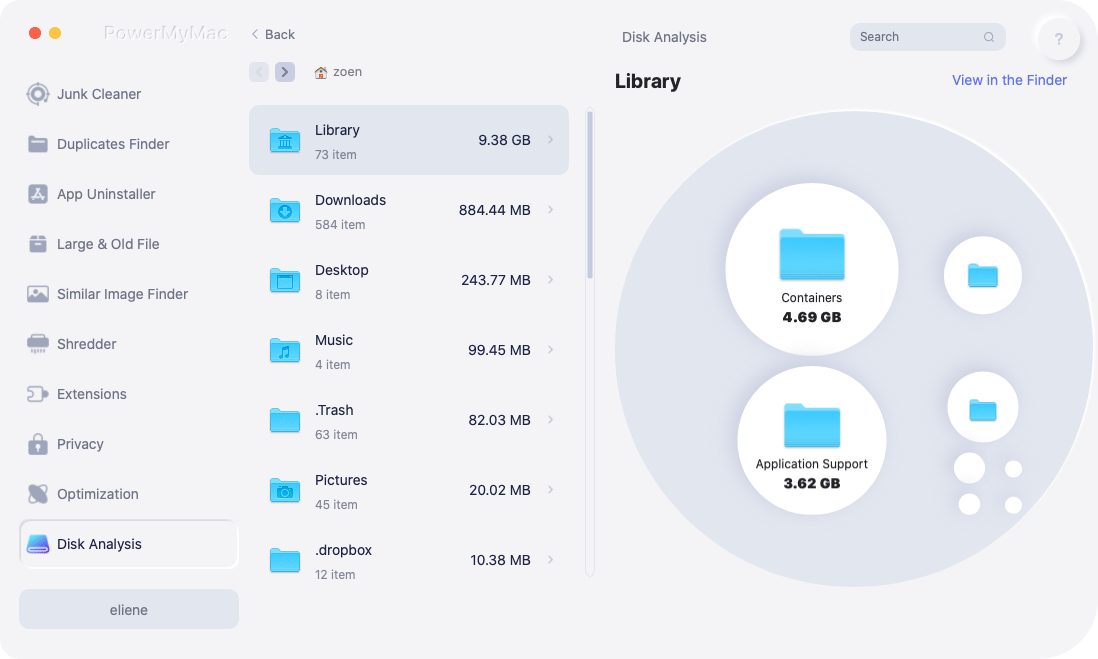
Disk Analysis can help you scan all kinds of disk memory files located in the Library, Downloads, Desktop, Music, Trash, Pictures, Dropbox...So that you can have a quick look at what kind of files are on your Mac and how much space they occupy. Follow the steps below to analyze your disk space:
1.
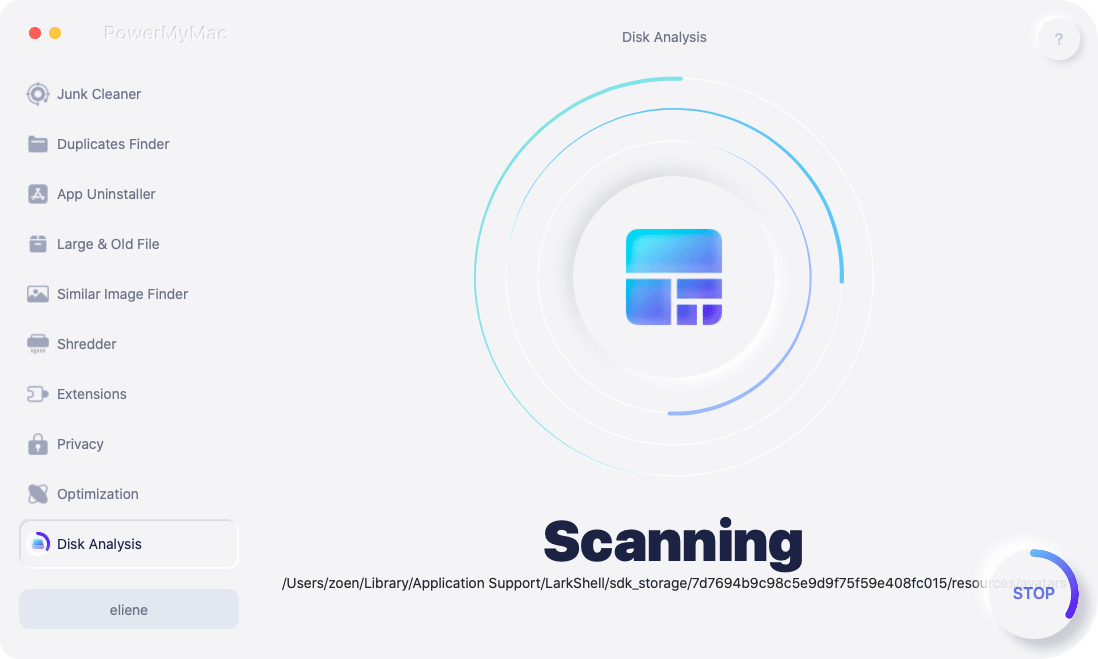
Launch PowerMyMac and click "Disk Analysis" on the left side.
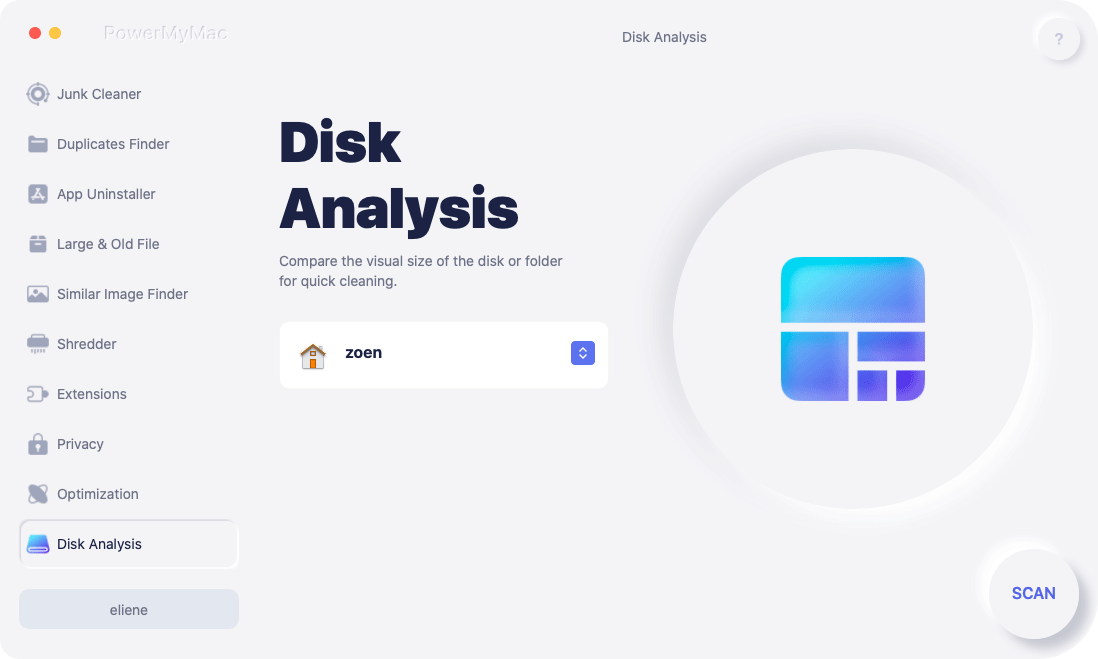
2.
Let PowerMyMac scan all your disk files and wait for the result.
3.
After scanning, you will see files are sorted by different locations and how many items are included in each location. You can also click "View in the Finder" in the upper right corner to access the file details.
How to Uninstall PowerMyMac
If one day you don't need PowerMyMac anymore, you can make use of PowerMyMac's App Uninstaller feature to remove itself completely. Here is how easy to do that:
1.
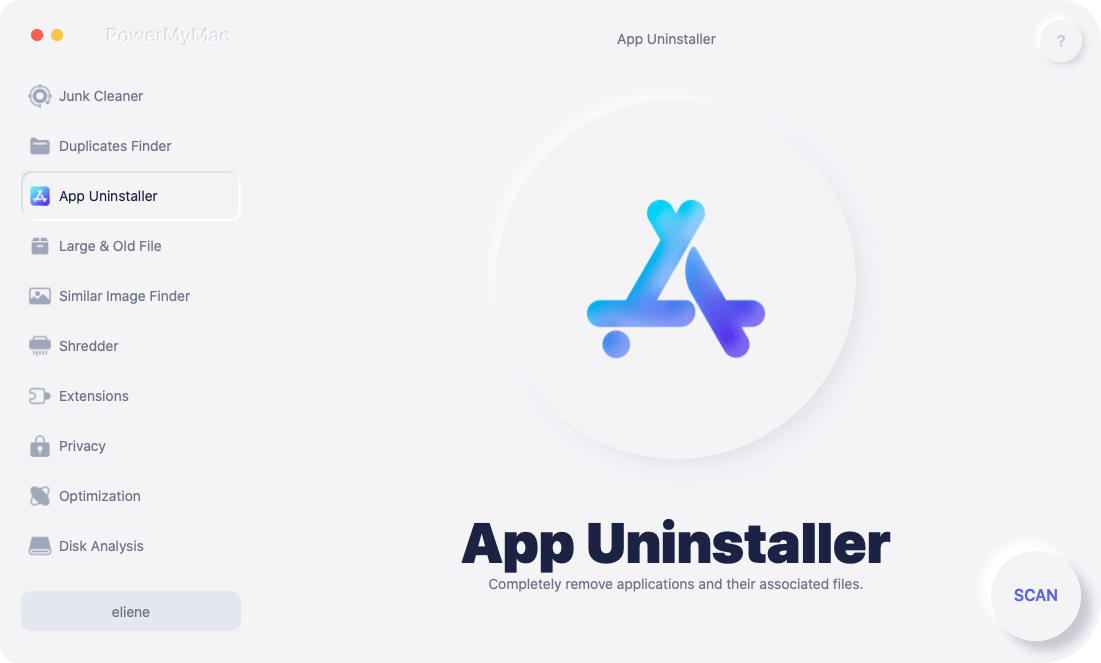
Launch PowerMyMac and Select App Uninstaller module.
2.
Press the SCAN button to find all the apps installed on your Mac.

3.
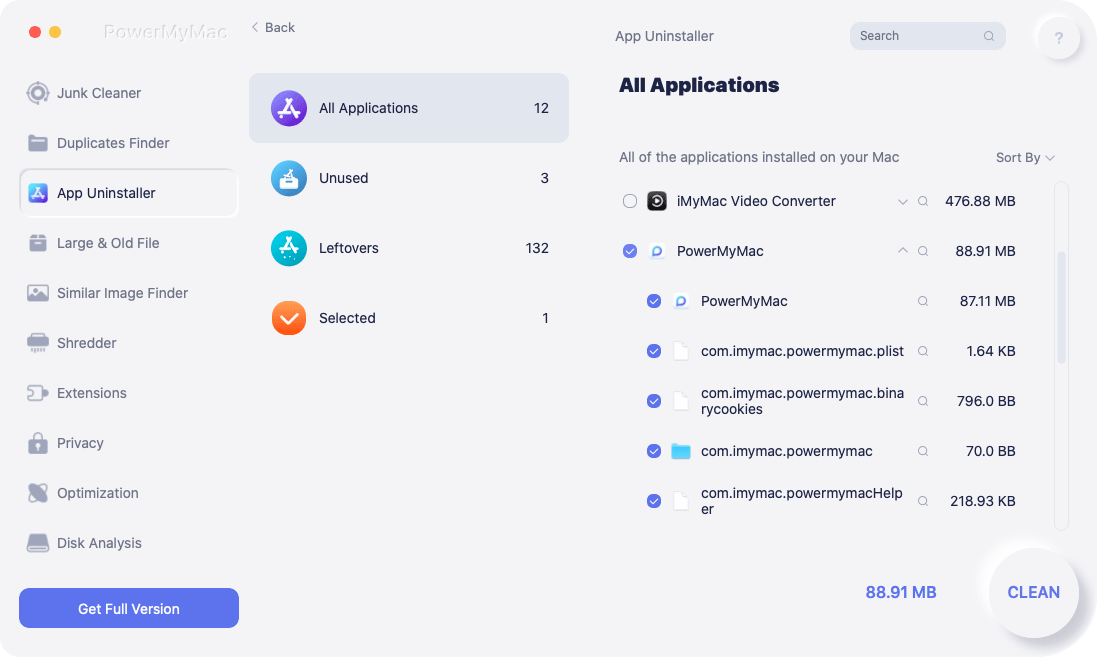
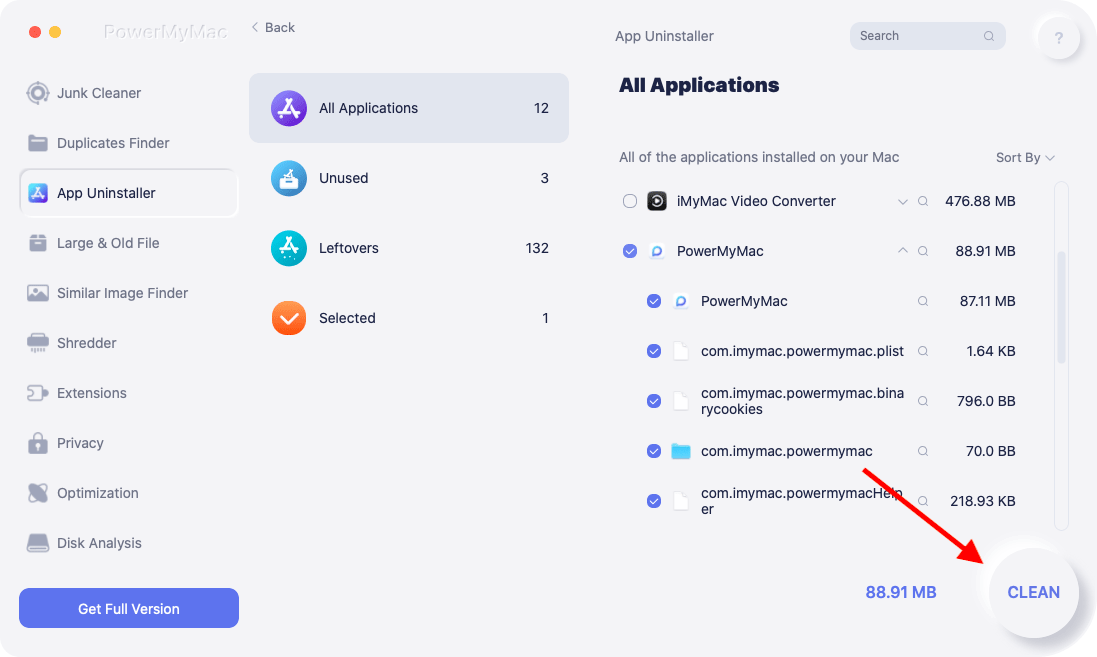
Locate PowerMyMac and choose it to uninstall.
4.
Click on the CLEAN button then PowerMyMac will remove it as well as its related files together.
5.
When PowerMyMac is successfully uninstalled, the program will automatically exit.


