If you are wondering what is a Logitech Unifying Software Mac, then this is for you.
A Logitech Unifying software is a program that will allow you to connect other devices to your Mac by utilizing a certain Unifying receiver. Through this, you will be able to use the advancement and the wizard of your Mac’s software and look for the status of the devices that you have, the battery level, and the firmware version.
What's more, we will share with you how to uninstall any apps from Mac including Unifying Software.
Contents: Part 1. What Is Logitech Unifying Receiver for Mac?Part 2. How to Connect A Certain Device to The Receiver by Checking Unifying Logo?Part 3. Uninstalling the Logitech Unifying Software on Mac ManuallyPart 4. Uninstalling Logitech Unifying Software on Mac - Easier and Faster WayPart 5. In Conclusion
People Also Read:How to Clear Scratch Disk in Photoshop on MacComprehensive Guide on How to Remove Unnecessary Files
Part 1. What Is Logitech Unifying Receiver for Mac?
A Logitech Unifying Receiver is just a small wireless USB receiver. This device will let you use up to six Logitech human interfaces such as mice, keyboards, trackballs, and trackpads for your Mac. This device will allow you to assemble with any Logitech product. If it happens that you have an extra receiver or if you have just one receiver and want to connect many devices in one receive, then that means that it will compel your Logitech unifying software on Mac.
You also have to keep in mind that when you connect several devices to a single receiver, they will all be connected in one way and that is through the use of your Bluetooth. However, there are instances that the protocols will not match. Also, a Logitech receiver that is compatible with its protocol can be known through the orange logo.

Part 2. How to Connect A Certain Device to The Receiver by Checking Unifying Logo?
You can connect up to 6 devices to a Unifying receiver. All you have to do is to check on their unifying logo.
- Launch the Logitech Options Software on your computer.
- Check the lower right part of the Welcome screen.
- Choose the Add Unifying Device option.
- Follow the instructions that you see on your screen.
If you still do not have the Logitech options software, download and install it on your device. Once you have this software, simply follow the steps below to connect your device.
- Launch the Logitech Options Software on computer. Start > Programs. Then choose Logitech and Logitech Options.
- Check the lower right part of the Welcome screen. From there, click on the Add Devices button.
- Choose the Add Unifying Device option.
- Follow the instructions that you see on your screen.
Part 3. Uninstalling the Logitech Unifying Software on Mac Manually
When it comes to uninstalling the Logitech Unifying Software on your Mac, it can be a little bit complicated for those first timers. There are actually some options that can help you with it.
As we all know, applications that we have on our Mac devices are known to be self-contained. That is why when you drag and drop a certain app on your trash, it actually works. So, with that, you can utilize this method to remove the software from your Mac.
So, here is a quick guide that you can follow for you to uninstall the Logitech unifying software on your Mac.
- Close the Logitech Unifying Software on Mac if it is still running on your device.
- Launch Finder and then choose Applications from its sidebar.
- Look for the Logitech Unifying Software and drag it to your Trash. Or you can also right-click on the icon of the app and then choose the “Move to Trash” option.
- Key in your admin password if needed.
- Empty your Trash by right-clicking on the Trash icon from your Dock and then choosing “Empty Trash”.
However, uninstalling any applications from your Mac this way can leave some leftover files that are still sitting on your Mac and still consumes space. And with that, it is a must that you remove all of the residue files that the Logitech Unifying software leaves. So, for you to remove all those leftover files, here are the steps that you can follow.
- Launch Finder and click on “Go” and then “Go to Folder” from the menu bar.
- Enter
/Libraryand press the Enter key.
Type in Logitech unifying software from the search box on your screen. Then click on Library located beside the Search box. - Look for those files that match the keyword that you have entered in the search box. Then right-click on them and choose the “Move to Trash” option.
- Do the same process when you go to the
~/Librarydirectory folder. - And for the other junk files that the Logitech Unifying Software left behind, you can look for them in the following directories below.
/Library~/Library/Library/Application/Support~/Library/Preferences/Library/Caches/~/Library/Caches/Librayr/LaunchAgents~/Library/LaunchAgents/Library/LaunchDaeomons~/Library/LaunchDaeomons/Library/PreferencesPanes~/Library/PreferencesPanes
/Library/StartupItems~/Library/StartupItems
And once that you are done with removing all of the residue files of the Logitech Unifying Software on Mac, you have to make sure to empty out your Trash. Doing this will permanently delete all the residue files from your Mac which means that you will also be able to free up some space as well.

Part 4. Uninstalling Logitech Unifying Software on Mac - Easier and Faster Way
Aside from the situation that you can manually uninstall the Logitech Unifying Software on your Mac, there is also another easier and faster way for you to do this task. And that is by using a powerful Mac uninstalling tool that will allow you to uninstall any apps that you have on your Mac including the Logitech Unifying Software and at the same time, remove all of the residue files with just one click of a button.
And the powerful tool that we highly recommend is the iMyMac PowerMyMac. This tool is considered to be an all-in-one Mac tool for you to optimize your Mac device. It can clean up all of the unwanted files on your Mac. Here is how you can do the uninstallation once you have downloaded and installed the software on your Mac device.
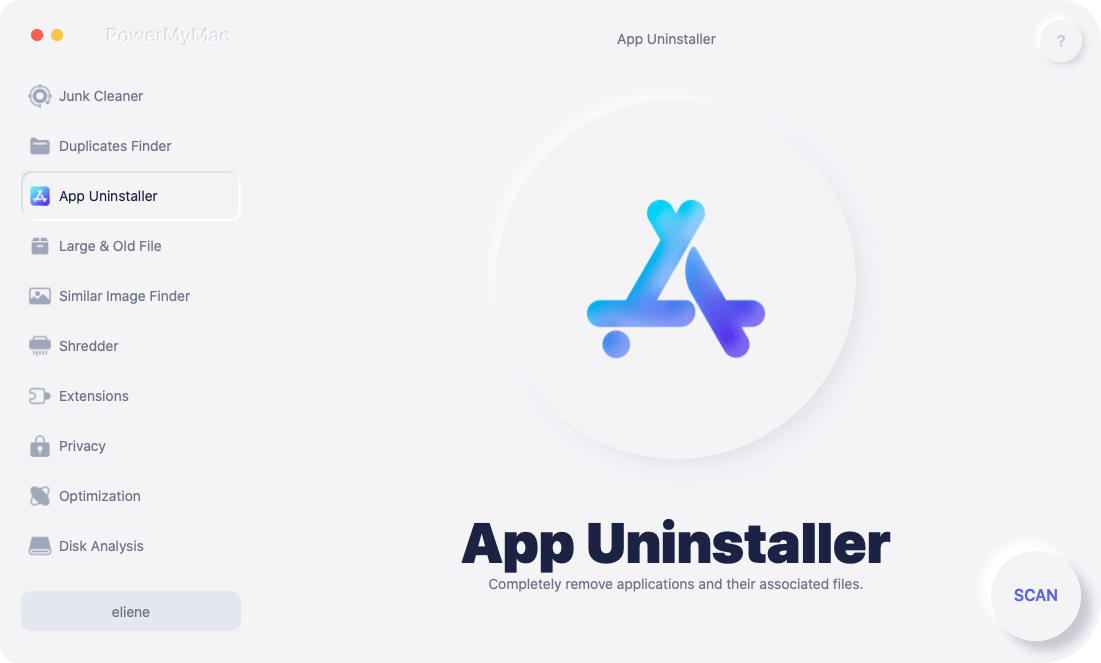
Step 1. Choose Uninstaller Module
Get the program running and you will see the system status of your Mac.
From the main page of the program, simply click on the App Uninstaller.

Step 2. Do A Scanning Process
PowerMyMac will then require you to scan your Mac. Simply click on the SCAN button.
Step 3. Check Out the Scanned Result
Once the scanning process is ongoing, just wait patiently until it is done. Then you can see the whole result of the scanning process.
Step 4. Look for the Logitech Unifying Software
Now scroll down to search for the Logitech Unifying Software.
An alternative way is by using the Search bar at the top of your window screen and type in Logitech Unifying Software and then press on the Enter key.

Step 5. Click on The Files to Remove
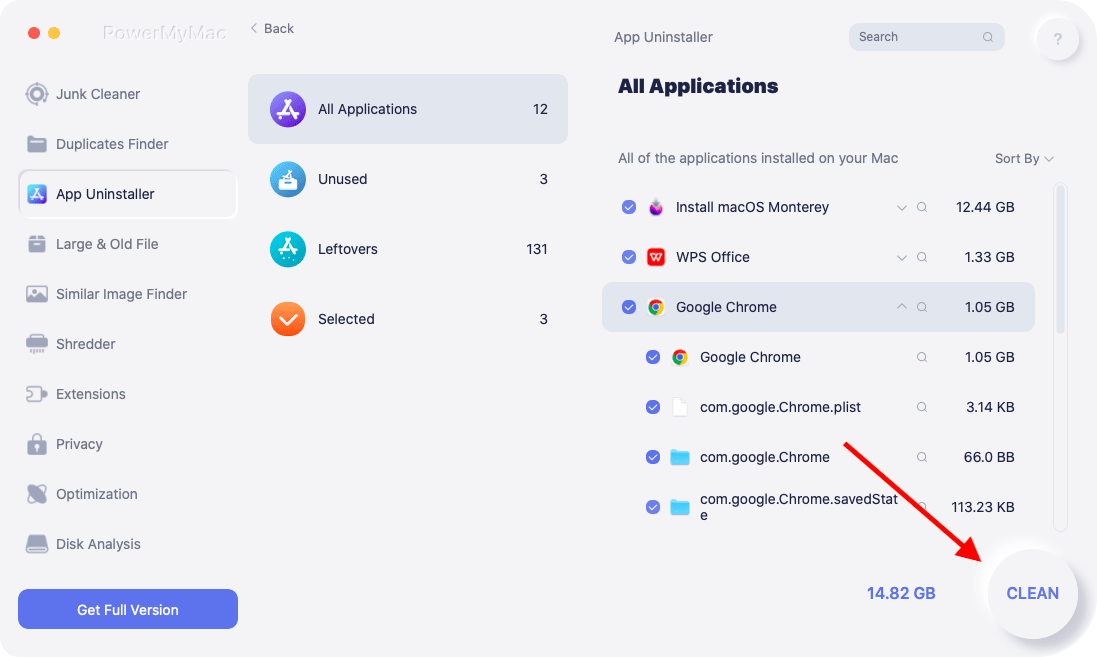
Click the Logitech Unifying Software on Mac. Then all of the files or the folders that is under the Logitech Unifying Software will also be shown on your screen which is at the right part of the page.
Choose the files or folder that you would want to remove from your Mac. You can click on them one by one, or you can also make use of the “Select All” button located at the upper-most part of the page. Another thing is that you can make use of the “Sort by” option for you to be able to find all the files that you want to remove.
Step 6. Uninstall the Logitech Unifying Software
Then click on the CLEAN button. The Logitech Unifying Software will be uninstalled from your Mac and at the same time, all of the files that comes with the app will also be removed.

Part 5. In Conclusion
Now you can see that the Logitech Unifying Software on Mac actually comes in handy especially if you would want to go wireless. All you need to have are the devices that are compatible with the software and from there you will be able to have a better experience in using your Mac device.
But just in case that you no longer want this on your Mac, you can easily have it uninstalled using the PowerMyMac.


