Crashplan is a pretty handy program that helps users backup information on a cloud while fighting off malware. This sounds really handy, but sometimes it just isn’t what you are looking for or need, so if you want to uninstall it, then you’ll definitely want to keep reading this how to uninstall Crashplan from Mac.
Tips:
Article GuideBenefits of uninstalling Crashplan or any other unused programsUsing the most thorough method availableUsing the manual uninstall methodA clear conclusion
Benefits of Uninstalling Crashplan or Any Other Unused Programs
Most people prefer to leave well enough alone, but the reality is that some of those programs that you’ve left alone can take up some processing power from your Mac. Programs can run in the background, forcibly taking valuable assets from your Mac, slowing everything else down. Assuming you’ve somehow dealt with that, the unused programs will definitely take up memory space and in the long run will just become clutter that will encumber your Mac. Getting rid of them as soon as you are 100% sure you no longer need them is always the most beneficial to your Mac.
Using the Most Thorough Method Available
A how to uninstall Crashplan from Mac that does not start with the most efficient method, might not be what you are looking for. You are likely looking for the easiest and most complete way to get rid of Crashplan along with all the files related to it and we strongly suggest using PowerMyMac to meet that specific need.
PowerMyMac is a power tool that can help you maintain the health of your Mac, it can also do so much more for the longevity of your Mac. Of course, uninstalling is one of the things that PowerMyMac specializes in and all you need to do is follow these steps in order to completely get rid of Crashplan from your hard drive.
Step 1: Download and install PowerMyMac - Visit the website and find PowerMyMac, go through the necessary steps to download it and then follow the procedures in order to install it.
Step 2: Open PowerMyMac - When installation has been successfully completed, open up the program. As soon as you open it, PowerMyMac will give you a broad overview of your Mac’s health. This is always good to note and to see how your unit is handling your usage in general.
Step 3: Choose Uninstaller - For now, just choose Uninstaller as that is your target.
Step 4: Permission to scan - PowerMyMac will then ask if it is alright to scan through your files. Please confirm so you may proceed. This process may take a while, depending on how much information PowerMyMac has to sort through, but overall it shouldn’t take all that long. Kindly be patient and allow PowerMyMac to do its job to find all programs or apps it can uninstall for you.

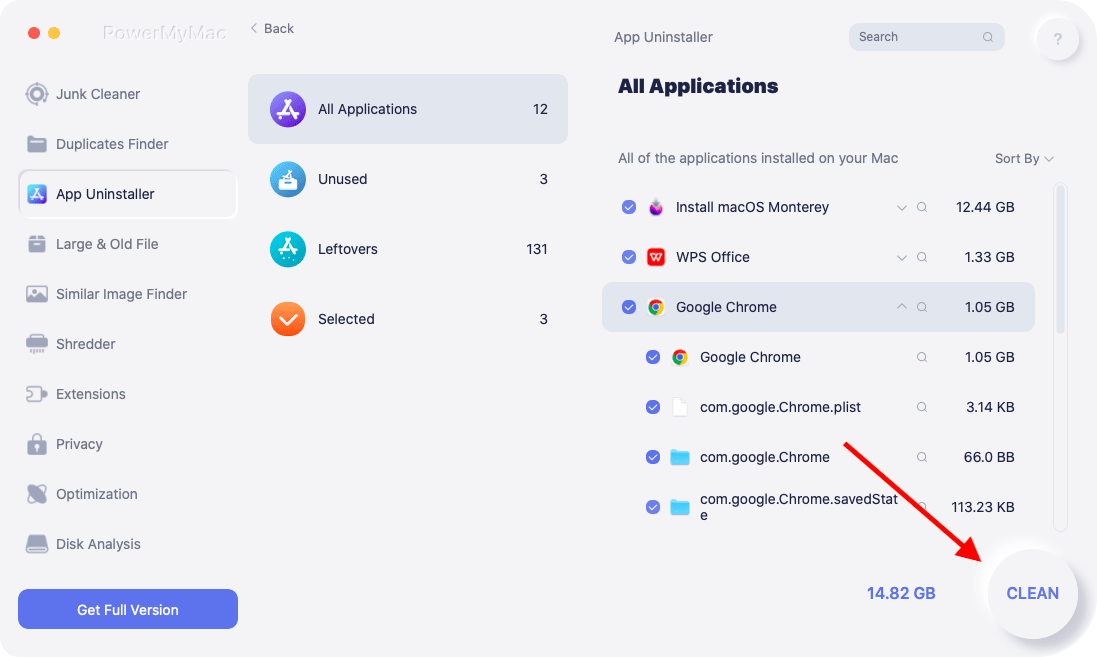
Step 5: Choosing the right program - When the scan has finished, you will be given a list of all the programs or apps you can uninstall. Find Crashplan and select it.
Step 6: Make sure to select the right files - You will notice that Crashplan has other files under its name, if you open the list you can actually tick them one by one, however, you’ll want to select all, if you want to remove everything from your Mac.
Step 7: Clean uninstall - PowerMyMac will then ask you if you really want to uninstall, this is a last defense of sorts just in case you made a mistake. Please double check one last time that you chose Crashplan and clean it, then PowerMyMac will cleanly remove Crashplan from your Mac along with every other file connected to it. You can now rest easy and be sure that Crashplan is nowhere near your Mac anymore.

Using the Manual Uninstall Method
It is good to note that there is a manual method of uninstalling Crashplan, this is more ideal for those who are quite used to a Mac, but be forewarned, this method can take quite a bit of time overall.
To uninstall manually, just follow these steps to remove Crashplan from your Mac.
Step 1: Quit Crashplan - To start with, you will need to make sure that Crashplan is not running. Open up your Utilities folder, find the Activity Monitor and search for Crashplan. Should it not be there, it is likely that it is not running, however, if it is, then simply select it and then press the Quit button.
Step 2: Drag Crashplan to the trash - Find the Crashplan logo and then just drag it down into the trash bin. Kindly note that you may be required to input the administrator password if you are not logged in as an administrator, just type it in and the trash bin should accept Crashplan.
Step 3: Empty the trash bin - Open up the trash bin and then delete everything there, including Crashplan. This will complete the uninstall process of Crashplan.
That was indeed a shorter process, however, you aren’t exactly done yet. Unlike PowerMyMac, there are still files related to Crashplan cluttered inside your Mac. Finding it can be a little taxing to most people, but if you are able to find it and repeat the process above, that is about the only time you will complete the uninstall process for real. As mentioned earlier, this can be rather time consuming if you aren’t too savvy with a Mac.
People Also Read:How To Do A Force Quit On MacA Guide on How to Uninstall Skype on Mac Effectively
A clear conclusion
In the end, it all boils down to your preference and how you want to go about uninstalling Crashplan from your Mac. Choose whichever best fits your needs and be ready with whatever outcome you have decided on, after all, the health of your Mac always depends on you.


