Do you have concerns about properly uninstalling DiskWarrior Mac but cannot do so? This article will demonstrate how to properly remove this app and provide a basic list of steps readers may follow if they experience a failed or ineffective removal from their machines. Use a strong uninstaller or follow the instructions in this article to do it manually.
Contents: Part 1. Why It Is Hard to Uninstall DiskWarrior on Mac?Part 2. How Do You Uninstall DiskWarrior on Mac If There Is No Uninstaller?Part 3. How Do I Completely Uninstall DiskWarrior on Mac?Part 4. Conclusion
Part 1. Why It Is Hard to Uninstall DiskWarrior on Mac?
Uninstalling DiskWarrior on a Mac can be difficult for several reasons:
-
System-Level Integration: DiskWarrior interacts deeply with macOS’s file and disk repair systems. This tight integration means it may place files in multiple system directories, including
/Libraryand/System, making them harder to locate and remove. -
No Built-In Uninstaller: DiskWarrior doesn’t come with a native uninstaller, which makes complete removal more challenging. Without an automated tool, users have to manually delete files associated with the software, often spread across various folders.
-
System Integrity Protection (SIP): On newer Macs, SIP restricts modification of certain system areas, which can prevent you from deleting files that DiskWarrior installed in protected directories. This may require temporarily disabling SIP for full removal, though this is generally not recommended unless you’re comfortable with advanced macOS modifications.
-
Background Services and Permissions: DiskWarrior may run background processes to monitor disk health. These services can persist unless manually stopped, and they may require administrator privileges for removal.

Part 2. How Do You Uninstall DiskWarrior on Mac If There Is No Uninstaller?
If there is no uninstaller, you may always attempt to uninstall DiskWarrior Mac by using Launchpad or Finder. This is a general option even if there is no uninstaller for the application.
Launchpad may be used to uninstall applications that were purchased from the Apple App Store. Launchpad provides a straightforward method for removing applications that have been obtained via the application store.
- Launchpad may be opened by clicking its icon towards the Dock or by opening it from the Applications folder on your computer. You might also pinch the trackpad closed using your fingers on the other hand.
- If you can't locate the application on Launchpad, you may search for it by typing the app's name into the search area that is located above in the upper part of the screen of Launchpad.
- You may make the applications jiggle by either pressing and holding the option button or clicking and holding any app.
- You may remove an app by first selecting it, then clicking the remove button that is located next to it, and then clicking Delete again to confirm. After that, the application will be removed straight away.
You may access the Finder in a variety of ways, including clicking the icon on the desktop or the one that's located within Dock.
- Choose the application that you desire to remove from your device.
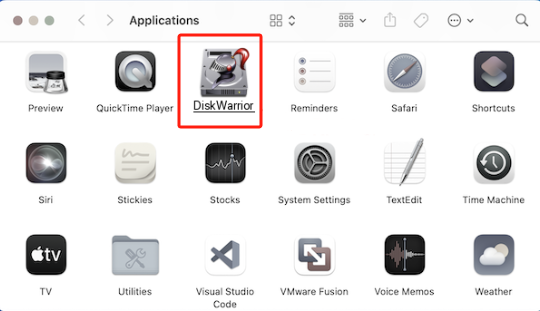
- The common thing of programs are located in the Applications folder of your computer, which you can access by selecting the Applications button located within the sidebar in any Finder screen. You may also access applications by selecting Go then Applications via the Finder's menu bar.
- To transfer the program to the Trash, you may use one of the following methods:

Put the app in the trash by dragging it there.
After making your selection, go to the options bar and pick File to Move in Trash.
- After selecting the application, delete (Command-Delete) will appear on your keyboard.
- Input the name as well as the password of the administrator account for your Mac if prompted for a password and user name. In most cases, the username and password that you provide in doing this part will be used to log into the Mac.
- After you have moved the program in Trash, select Finder then look for Empty Trash from the menu bar to permanently remove it.
Part 3. How Do I Completely Uninstall DiskWarrior on Mac?
With the use of mouse clicks, you can effortlessly uninstall DiskWarrior Mac along with all of the associated files on your Mac if you utilize the iMyMac PowerMyMac. You won't need to search for each of the app's relevant files individually. Check out how successfully this software removes undesirable programs:
- Click the SCAN option to thoroughly inspect every piece of application that is available on your Mac after selecting App Uninstaller.
- Following successful scanning, you can see all programs. To find the problematic software, you may either browse through the list or enter its name in the keyword search box in the top right corner of the display.
- After selecting the program, you wish to remove, press the Unfold icon to access associated documents. The program will be deleted together with every one of its associated data if you click the CLEAN option.
- The "Cleaned Completed" display screen also shows the frequency in which files are removed and the amount of available space on the drive that was cleaned. Simply select the Review option to return to the page wherein the scan findings were shown if you wish to remove any further apps.

Part 4. Conclusion
There are presently several ways to uninstall DiskWarrior Mac and any other program on Macs. Nevertheless, you may have to put an excessive amount of energy and time into getting rid of that manually. An automatic removal tool is the best option if you want to remove programs from the computer without encountering any of the typical problems that come with doing so manually. To clean up your Mac and make the removal process simpler, use the PowerMyMac application.


