Are you new to Mac? If yes, then you must be unfamiliar to remove some of its applications. This page is teaching you how to uninstall Google Play Music Manager completely on Mac. Please read the post thoroughly as we provide you with some solutions which some users found very helpful.
Once installed, some of the app subfolders are stored somewhere in your Mac files such as the app is typically stored in the /Applications directory while the user preferences are stored in ~/Library/Preferences directory. Below are some methods on how to uninstall Google Play Music Manager on Mac.
People Also Read:
- How to Uninstall Multiple Programs on Mac
- How To Downgrade, Reinstall, Or Uninstall iTunes On Your macOS
Article GuidePart 1. How to Uninstall Google Music Manager Automatically?Part 2. How to Uninstall Google Play Music Manually?Part 3. Conclusion
Part 1. How to Uninstall Google Play Music Manager Automatically?
Why remove a program yourself when you can install an app to do it for you? That’s exactly what PowerMyMac can do.
PowerMyMac is iMyMac’s powerful application cleaner that manages programs on Mac with just a few clicks. This one-of-a-kind Mac cleaner doesn’t just remove programs; it serves multiple purposes such as optimizing your Mac’s performance. You don’t have to install a separate app to do optimization for you.
Is it safe to disable and uninstall Google Play Music Manager from Mac? Yes! PowerMyMac will let you safely and completely uninstall unwanted applications on Mac.
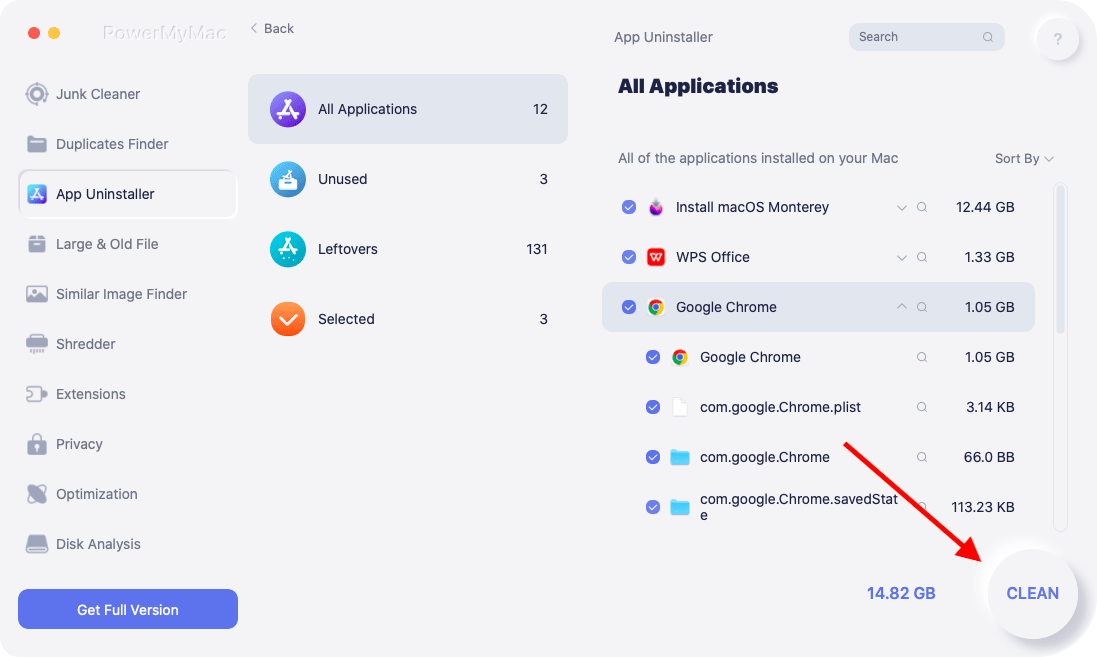
How do I uninstall Google Music App quickly? Here’s a step-by-step guide on how Uninstaller helps you uninstall Google Music Manager automatically:
- Launch PowerMyMac on Mac and choose Uninstaller.
- Click the Scan button. And after scanning, your Mac’s apps will be displayed on the screen.
- Find the Google Play Music Manager from the list of apps and click it.
- Choose Select All if you wish to remove all files related to Google Play Music Manager.
- Press the Clean button to uninstall Google Music Manager and all its related files.

Part 2. How to Uninstall Google Play Music Manager Manually?
Since Google Play Music is no longer available, you might wonder can I uninstall Google Music manually? The answer is yes, but you should remove all files and folders related to the Google Music Manager program. For this, take the next steps to delete Google Play Music Manager:
- Open Finder and go to Folder.
- Choose Google Play Music Manager.
- Move to Trash.
1. Make sure the app is not running, and then click folder → Music Manager.app → move to Trash.
2. To delete its subfolders, open Finder → Go → Go to Folder → type ~/Library and click Go.
3. Now you need to find and delete all subfolder files related to the Google Play Music Manager app. Check out & delete these files in the next directories:
~/Library/Application Support/Google/MusicManager google play music manager app~/Library/Google/GoogleSoftwareUpdate/Actives/com.google.musicmanager/ google play music manager mac~/Library/Logs/MusicManager/MusicManagerHelper.log/~/Library/Preferences/com.google.musicmanager.plist/ uninstall music manager~/Library/PreferencePanes/MusicManager.prefPane/google play music manager
4. In order to completely uninstall Google Play Music Manager, you also need to check the files below for any leftover caches/subfolders:
~/Library/Caches/~/Library/LaunchAgents~/Library/LaunchDaemons~/Library/StartupItems
5. For the last step, complete the uninstallation by emptying the trash bin.
Part 3. Conclusion
As you can see, you have the option to uninstall Google Play Music Manager manually. But there’s a chance that some associated files will be missed and might cause your software update to fail. Now that there’s an app for almost everything you need, it’s no longer cost-efficient to uninstall programs on your own.
With help from PowerMyMac app cleaner, you now have the easiest and most complete way to remove Google Play Music Manager from your Mac. You can test-run our free trial version with no strings attached.


