


Taking screenshots is helpful when making materials for your group presentations, reports, and tutorials, or when explaining an issue that needs fixing. The images speak better than the texts. However, there are cases when some users aren’t fully aware of how just to snip a portion of their screen and so, they usually end up capturing the whole screen. Thus, we created this post to help those who are still, at this moment, finding out how to crop screenshots on Mac.
Contents: Part 1. How Do I Crop a Screenshot on My Mac Easily?Part 2. What Is the Shortcut to Crop a Picture on a Mac?Part 3. How to Crop a Screenshot on Mac with Preview?Part 4. How to Crop a Screenshot on Mac with a Touchpad?Part 5. How to Crop a Screenshot on Mac Online?Conclusion
Part 1. How Do I Crop a Screenshot on My Mac Easily?
Rather than be content with just knowing how to capture full screenshots, you should know that there are reliable apps that can help you crop screenshots on Mac with ease. One of the most trusted, proven effective, and highly suggested by many is the iMyMac Screen Recorder.
The abovementioned tool has been known to the public as one of the best when it comes to HD, high quality, and lag-free screen, webcam, and audio recording. But this is also equally effective when the talk is about capturing snapshots. Additionally, it has plenty of amazing features its users can take advantage of. Apart from supporting Mac, it can also be installed on Windows computers so that you can take your favorite screenshots on Windows.
Get A Free Trial Now! Normal Mac M-Series Mac Get A Free Trial Now!
Here’s a quick guide on how you can easily crop screenshots on Mac with the help of the iMyMac tool.
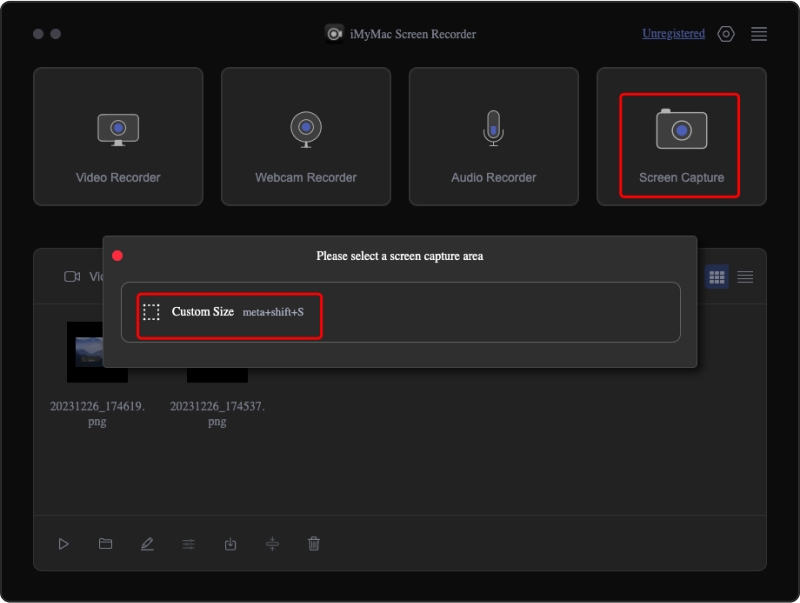
- Upon installing it on your Mac, proceed to immediately launch it. From the main interface, select the “Screen Capture” menu.
- You’d have to press “Custom Size” next to continue with choosing an area to capture.
- Move your mouse to the desired section to snip. You may use the available tools to further enhance the output – editing menus, etc.
- When done, tap the checkmark at the bottom. Automatically, the screenshot taken will be saved into your Mac!
As simple as following the above, you can easily take images of parts of your screen!
Part 2. What Is the Shortcut to Crop a Picture on a Mac?
Apart from the use of a professional tool like the previously mentioned, to crop screenshots on Mac, utilizing keyboard shortcuts is also a good action to take. We’ll discuss this option in this section just in case you wish to give it a try.
#1. Shift + Command + 3
By pressing the “Shift + Command + 3” key combination on your Mac at the same time, you’ll be able to capture a full shot of your screen. Afterward, you will see a thumbnail of the image taken at the bottom, you can press this to proceed with cropping.
You may use the Photo app to look for the screenshot afterward. Simply double-click the image and press the “Edit” menu. Choose the “Crop” option from the toolbar to proceed. Upon pressing “Done”, you’ll get the cropped image saved to your Mac.
#2. Shift + Command + 4
If you think that getting a full screenshot before you proceed with cropping is a bit of a hassle, you should be aware that there’s a way you can crop screenshots on Mac even though you’re still in the capturing stage. You just need to hold the “Shift + Command + 4” keys. This will let you capture a part of your screen.

When pressed, your mouse will turn to a crosshair. Drag this to specific the region to snip. Just release your mouse when you’re satisfied with the area. The image will be saved automatically to your Mac.
#3. Built-in Tool
A built-in tool like the “Screenshot App” can also be utilized to crop screenshots on Mac.
- Press the “Shift, Command, and 5” keys.
- Tap the relevant menu to take a snapshot. You can either take a screenshot of your full screen, a section of it, or a window.
- Feel free to make use of the available features before pressing the “Capture” button.
- When finished, a thumbnail will be seen at the bottom, press this to open the image and continue with cropping.

Part 3. How to Crop a Screenshot on Mac with Preview?
Another tool on Mac like “Preview” can also be utilized to crop screenshots on Mac. Here’s a quick tutorial.
- Click the image to be processed.
- You should see it in the preview window. Click and drag to decide on the area to keep and remove.
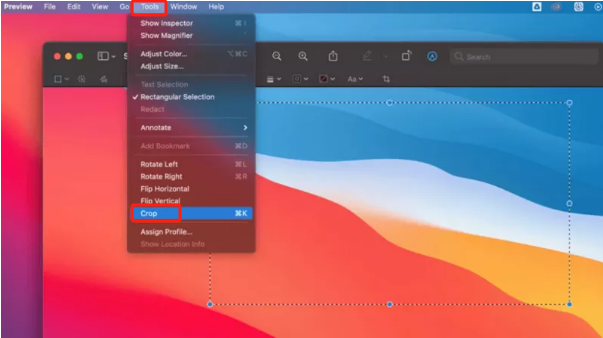
- Upon completing the second step, press “Tools” and then choose “Crop”.
- Ensure that you have saved the image before closing the window.
Part 4. How to Crop a Screenshot on Mac with a Touchpad?
Using Touchpad to crop screenshots on Mac is also possible. It’s just that it’s only available on the newer versions of Mac.
- Locate the screenshot to be edited.
- Make sure that the “Screenshot” icon has been enabled on the Touch Bar. A camera-shaped icon should be seen.
- Press the mentioned icon and choose the type of screenshot to capture.
- When done, tap the thumbnail to continue with cropping.
Part 5. How to Crop a Screenshot on Mac Online?
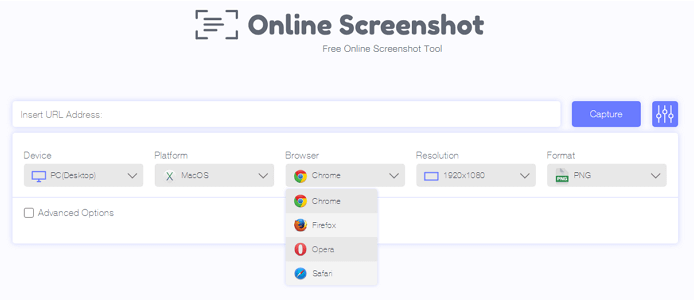
Do you know that you can also crop screenshots on Mac via an online method? Do you find it interesting? Well, you can use a tool like “Online Screenshot”. You just need to keep in mind that a stable internet connection is needed in this case.
- Simply go to the website of Online Screenshot.
- Paste the URL of the webpage to capture.
- You may or may not adjust some settings depending on your needs.
- Tap the “Capture” icon to take a screenshot.
- To finally save the image, press the “Download” button.
Conclusion
To crop screenshots on Mac, you have plenty of options to consider and choose from. Utilizing shortcut keys and built-in tools as well as online sites is good enough. However, if you’re looking to have the best experience, it’s always recommended to rely on professional apps like the iMyMac Screen Recorder.
