


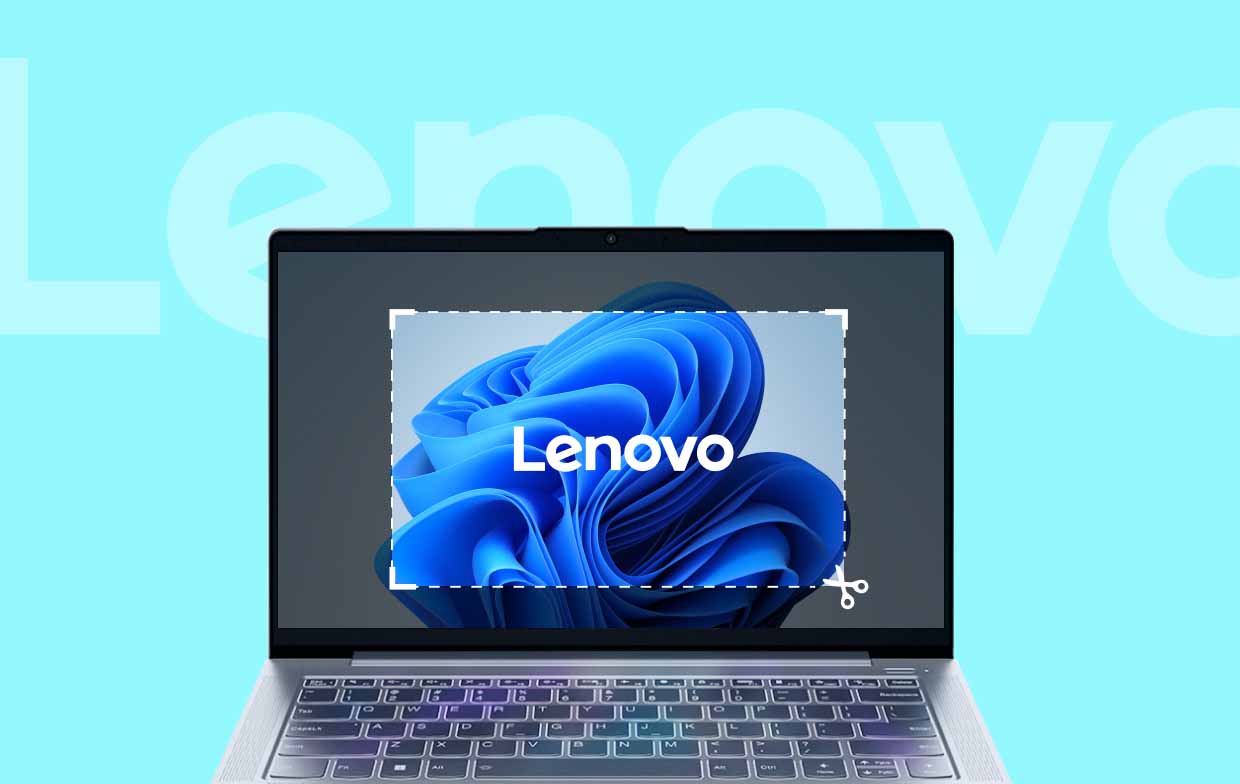
Taking screenshots has been so helpful to people who make schoolwork for students and materials for employees. When making guides or presentations and tutorial materials and when explaining issues, using screenshots is better than explaining in words. Showing images will let people easily understand more.
This article’s focus would be on the process of how to screenshot on Lenovo laptops. If you are a Lenovo laptop user and have been curious about it and haven’t found the best guide yet, then keep reading this post until the end.
Contents: Part 1. How to Take Screenshots on a Lenovo Laptop with Keyboard?Part 2. How to Screenshot on a Lenovo Laptop without the PrintScreen Button?Part 3. How to Take Screenshots in a Lenovo Laptop (Windows 7/10/11)?Conclusion
Part 1. How to Take Screenshots on a Lenovo Laptop with Keyboard?
If your Lenovo laptop has Windows 10 or later version, you should have more options for taking screenshots via the default method – using the keyboard. The keyboard combination to be used differs depending on the area you wish to capture. You can screenshot the whole page, a specific window, or just a section of your screen. Let’s find out how to screenshot on Lenovo laptops via the “Print Screen” option on your keyboard.
Option #1. Taking a Full-Page Screenshot
In most cases, users opt to take full-page screenshots. When doing so on your Lenovo laptop, you have two methods. The first one is by simply pressing the “Print Screen” button on your keyboard. The image taken will be saved under the “Screenshots” folder (under the “Pictures” folder). If you have an external editing tool, the image shall appear right away. Alternatively, you may also press the “Windows” key together with the “Print Screen” button. You will notice your laptop’s display will dim for a few minutes while the snapshot is being taken. The image should be saved to the same location mentioned.

Option #2. Take an Activity Window Screenshot
If you want to know how to screenshot on Lenovo laptops specifically of an activity window via a keyboard combination, you just have to press the “Alt” and “Print Screen” keys at the same time. The photo taken will be saved to your laptop. To see it, utilize the “File Explorer” menu and then go to the “Screenshots” folder under “Pictures”.
Option #3. Taking a Custom-Sized Screenshot
If you’re aiming to capture a custom-sized screenshot on your Lenovo laptop, you just need to hold the “Windows”, “Shift”, and “S” buttons on your keyboard. You may paste the image taken to the “Paint” app or to any other available apps that you wish to use if you’d like to edit the screenshot captured.
Part 2. How to Screenshot on a Lenovo Laptop without the PrintScreen Button?
It’s indeed simple and easy to capture screenshots with the help of the “Print Screen” key. But what to do if it is not working? How to screenshot on Lenovo laptops without the “Print Screen” button then? Some built-in tools will be shared here.
#1. Snipping Tool
- Open the “Snipping Tool” app on your Lenovo laptop.
- Click the “New” menu to take a snip.
- Press the “File” button to save the image taken.

#2. Game Bar
- Start by launching the Game Bar on your Lenovo laptop. Do it by pressing the “Windows” and “G” buttons.
- Decide on the section of the screen that you wish to capture. Tap the “camera” icon afterward. Alternatively, you may take a screenshot by holding the “Windows”, “Alt”, and “Print Screen” keys at the same time.
Automatically, you will see the image saved under the “Captures” folder.
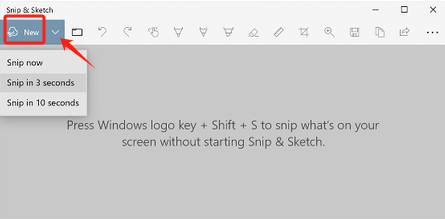
#3. Snip & Sketch
- Search for the “Snip & Sketch” tool by pressing the “Windows” key and then utilizing the “search” bar.
- Press the “New” menu. Select the type of screenshot to take.
- Take a screenshot.
- Basic editing can be done before saving the image (by pressing the “disk” icon).
Part 3. How to Take Screenshots in a Lenovo Laptop (Windows 7/10/11)?
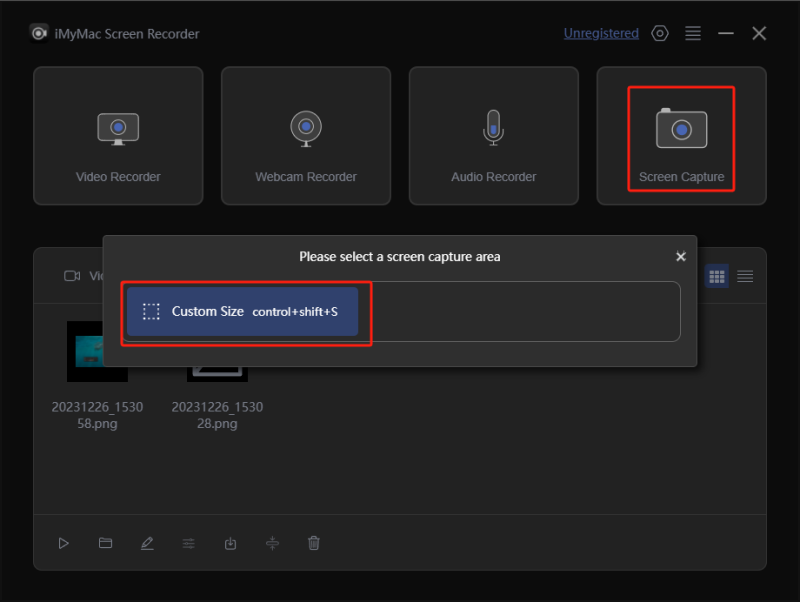
Upon sharing with you how to screenshot on Lenovo laptops with and without using the “Print Screen” button, we will now explain the best and easiest way of capturing screenshots – via the help of a professional software app named iMyMac Screen Recorder.
If you prefer a better method of capturing a screenshot, you might want to try the mentioned tool. This tool is mainly designed to assist with screen recording but also has a feature of taking screenshots. It offers bunches of other functions – editing menus, real-time annotation tools, etc. and has a simple interface that makes navigation too simple.
Apart from supporting Lenovo laptops, this app works well on Windows and Mac OS. Installing it won’t be an issue at all.
Get A Free Trial Now! Intel Mac M-Series Mac Get A Free Trial Now!
Here’s an easy guide on how to screenshot on Lenovo laptops via the iMyMac:
- Upon installing this program on your Lenovo laptop, open it and click the “Screen Capture” menu.
- To choose the area to snapshot, press the “Custom Size” button.
- Move your cursor to the area you wish to capture. There are available editing menus that you can use.
- To complete, press the check mark. Automatically, the screenshot will be saved to your Lenovo laptop.
Conclusion
The process of how to screenshot on Lenovo laptops is generally simple and easy. One may utilize the “Print Screen” key on his keyboard (and the keyboard combinations) as well as take advantage of the free and built-in tools like Snipping Tool, Game Bar, and Snip & Sketch. In case any of these options won’t work when needed or if you just prefer using a more advanced option, resorting to professional apps like the iMyMac Screen Recorder would be the key. Specific to this mentioned tool, navigation, and usage should be handy. Plus, high-quality results are always guaranteed.
